For carrying out repairs and other roofing works, which involve melting mastics and laying roofing materials, you will need a special gas burner. The device is primarily used to perform the following tasks:
— heating and drying of roofing materials;
— cutting and soldering of metal;
- layer firing old paint.
Approximate structure of a gas burner
The gas burner has enough simple design. It is a glass made of metal and equipped with a nozzle and a handle, which is attached to the body . Heat-resistant plastic or wood can be used to make the handle. Gas enters the housing passing through the gas pipeline. In most cases, propane under pressure is used to operate the burner.
The burner glass should have a shape that protects the flame from being blown out by the wind.
There is a valve on the burner body that allows you to adjust the flame length and intensity of the supplied gas. It’s good if the burner has a reducer, which allows you to use gas economically.
Roof burner components
During the assembly process of the device, mechanical processing is practically not used. The burner is assembled from ready-made spare parts. To make it we will need:
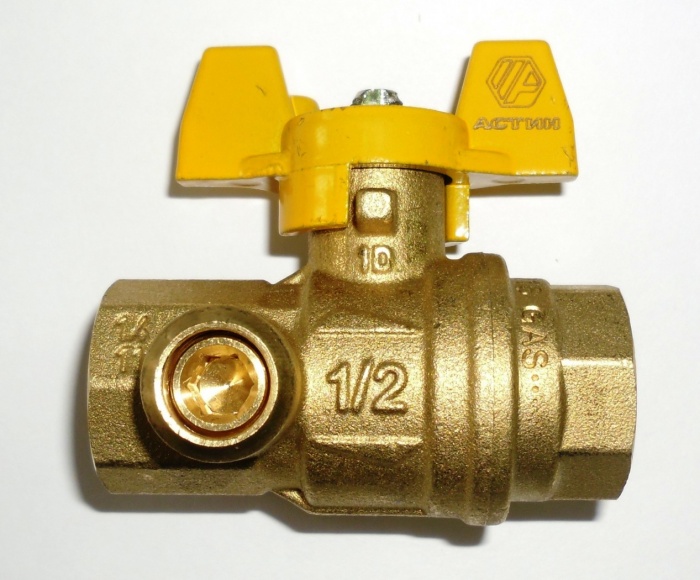
- A steel valve that can be taken from a cylinder intended for storing liquefied gas.
- A plug used for transporting gas cylinders.
- A nozzle from a blowtorch with a nozzle diameter of 0.8 mm.
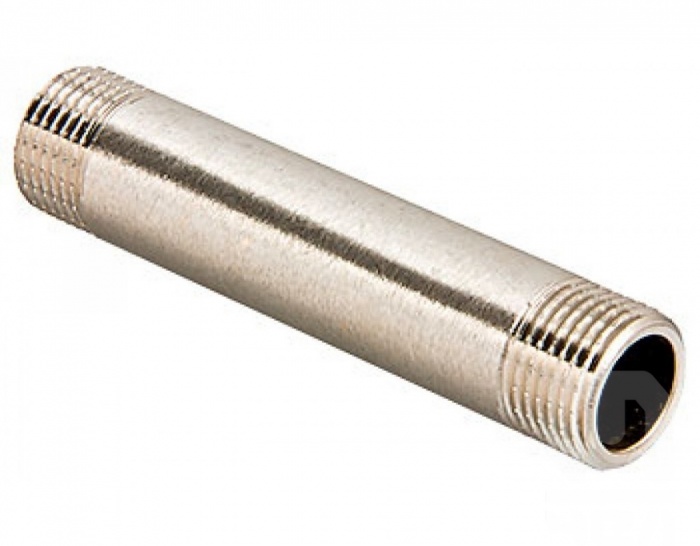
- A piece of pipe one meter long with an internal diameter of 10 mm. and steel thickness 2 mm.
- Wooden handle.
You can use the handle from a burnt-out soldering iron as a handle.
Step-by-step burner manufacturing process
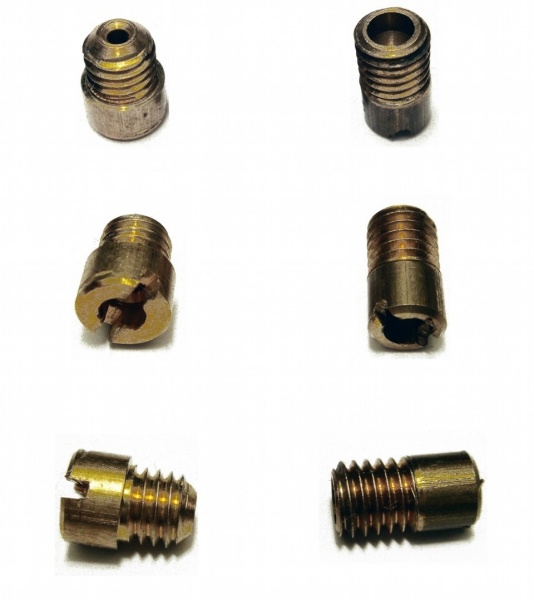
The process of manufacturing a gas burner begins with the supply tube, which we will use as steel pipe, we insert it into the handle and secure it with glue. The divider and body must be machined from a brass rod, the diameter of which should be 20 mm. In the finished body, two radial holes are drilled (each diameter is 5 mm) and four holes are drilled in the divider rod (each diameter is 1 mm).
When assembling, it is necessary to press the divider into the body with a slight tension. At the same time, the flange must be installed inside the housing with a gap, that is, the internal diameter of the manufactured housing must be 0.6 mm larger. diameter machined The resulting gap is responsible for the inhibition of the gas flow, which is supplied to drilled holes in the igniter.
 Such nozzles are found in purchased models
 To make a thin hole in our nozzle, you need to take a drill with a diameter of 2 mm. and use it to make a blind hole, which is 1.5 mm. doesn't reach the exit. Drill with a diameter of 0.4 mm. used for jumper. The resulting hole must be completely caulked with gentle hammer blows. Then you need to sharpen the end. For this we take sanding paper and sharpen until the desired cross-section of the outlet hole is found, that is, until the nozzle can be placed on the tip of the threaded burner tube.
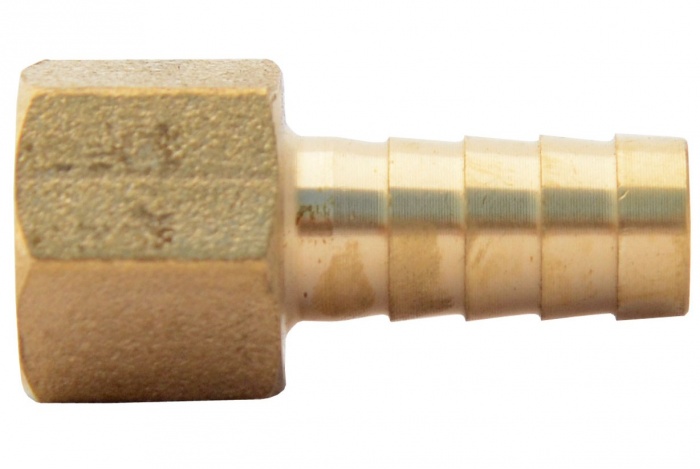
A supply hose made of fabric-rubber material must be attached to the end of the gas supply tube. Secure the hose to the tube with a clamp. We set the working pressure, after which we supply gas. Wait until all the air is forced out of the hose, and only then insert the nozzle into the flame of the gas burner.
A homemade gas burner is a device that has a number of advantages compared to its other analogs that run on gasoline and other types of fuel. The main advantages of gas burners are as follows: they are easy to use, do not emit harmful and unpleasant odors during use and do not smoke, like, for example, gasoline ones. In addition, it is very compact, which means it can be used in almost any sector of the economy. What are its features and how to make it yourself?
Gas burner device
Design of this instrument assumes the presence of the following main parts:
- Gearbox.
- Injectors.
- Fuel regulator (in in this case gas).
- Heads.
- The node where it is fixed
What does it work on?
As for fuel, a gas burner often runs on propane (or a propane-butane mixture). It fills a separate container (cylinder), which, as we noted above, is attached to a special unit.
Is it difficult to make it yourself?
It is worth noting that this device does not have any complex elements or parts in its design. Therefore, it is done with your own hands very quickly (as practice shows, the work takes no more than 30-40 minutes), and even a novice master can understand its design. In the case of gasoline devices, things will not be so positive.

Scope of application and design elements
It is used mainly for heating and drying materials, for cutting metal products, including pipes, and burning old paint. The burner design includes metal case(it also includes a special glass that prevents the wind from blowing out the flame), a nozzle (for igniting fuel), a handle that is attached to the body (by the way, its length should be no more than 100 centimeters), a holder (installed on the handle and made of wood or heat-resistant plastic), as well as gas hose. In addition, there is a gearbox and a supply pipe with a valve. The latter regulates the gas supply level and, accordingly, the flame length too.
How to make a mini gas burner with your own hands?
You can start with the simplest thing - with the handle. It can be made from wood, but it is best to take a ready-made one from a burnt-out soldering iron. The supply tube should be made of steel. Pay special attention to the sizes. The optimal diameter of the tube should be approximately 1 centimeter. Moreover, the thickness is no more than 2-2.5 millimeters. This tube must be inserted into the handle and secured. This can be done using regular glue.

Frame
We also make it from steel, namely from a brass rod 2 centimeters wide. A divider can also be made from it. Next you need to make several holes. This is necessary in order to ensure a normal supply of oxygen. Otherwise, at the slightest draft, the burner flame will go out or the gas from the nozzle simply will not ignite. How many holes should I make? There are 4 of them in total, each of which has a diameter of 1 millimeter. These holes must be made in the divider rod. In addition, drill 2 radical holes of 5 millimeters each directly in the body. All this will contribute to the normal combustion of fuel in the device, which will have a positive effect on the speed and quality of work performed.

How to make a homemade gas burner next? Next, you will need to press the divider into the body. In this case, the internal flange should be installed with a small gap (at least 0.6 millimeters). This gap will serve to slow down the flow of gas supplied to the igniter hole.
How to make a nozzle?
It will be machined from a metal rod. To make a hole in the nozzle, you will need to use a 2mm drill bit and make a blind hole with it. In this case, the distance to the exit should be at least one and a half millimeters. For the jumper we try on a drill with a diameter of 4 mm. The hole made is caulked with a hammer, then the end of the device is sharpened sandpaper. It needs to be processed until the moment when the nozzle can be screwed onto the threaded tip of the tube.
Now a hose (it comes from the cylinder) made of a special rubber-fabric material is put on the end of the tube. It is secured with a regular clamp using a Phillips or minus screwdriver. When the operating pressure is set, supply gas and place the nozzle into the flame of the gas burner. This should be done only after the substance has completely displaced the air from the hose. Upper part parts should be sanded. It needs to be processed until the length of the burner torch is about 50 millimeters.
How to bring all these elements together?
The body together with the divider should be screwed onto the external thread of the nozzle. At the same time, a gas burner, made with your own hands, taking into account all the recommendations, should supply an even flame. It is important to ensure that the fuel does not emit soot during combustion.
What to do if the burner smokes and produces an uneven flame? In this case, you need to gradually turn the body on the nozzle thread. This must be done until the gas produces such characteristic smoke. If it is very loose, compact it. That's it, at this stage the gas burner has been successfully constructed with your own hands. Now you can safely use it on the farm.

A few words about how to use the tool
To ensure that a self-made gas burner is safe to use, before the first start-up, be sure to check its parts for leaks, namely solder joints, joints of connectors and sleeves. After this, open the valve half a turn and wait until the device produces a flame. Here the ignition process occurs automatically, so no further action should be taken. Now adjust the level and length of the supplied flame (this is done using a reducer or the same valve) and get to work.
So, we found out how to make a gas burner with our own hands, learned its design and the rules for using this device.
You can make a gas torch for soldering yourself. The design has different configurations. Often dimensions do not exceed length of a ballpoint pen. It is used to heat metal for the purpose of subsequent hardening or welding work. In some cases, a burner is made to heat the bitumen on the roof. Homemade devices are much cheaper than purchased analogues.
Description of the operating principle
The operating principle of a gas burner is based on the directed supply of a mixture of gas and oxygen. At the same time, the feed torch maintains a constant shape and temperature. As a result, after heating the 2 surfaces, a hermetically sealed connection is formed using molten solder. This material must have sufficient adhesion and adhere well to hot surfaces and have strength after cooling. The gas burner provides the temperature of the solder so that it becomes viscous. In this case, the total heating should not exceed the melting point of the base material.
In some cases, slight heat is applied. This is required when you need to dismantle a part that is press-fitted. For example, a bushing or a bearing. This is especially applicable to cases where parts have different expansion coefficients. Heating is also used in work when welding cannot be used.
DIY process
To make homemade equipment, you need to take into account some nuances:
- The device output temperature is 1000 degrees. Therefore, refractory metals are used in manufacturing.
- Important condition safe work- This is a reliable crane. In the event of an accident, it should quickly shut off the air flow.
- Reliability of the gas connection.
You can make a manual gas torch for soldering with your own hands in the form of a miniature device. For the manufacture of such mini-equipment materials needed:
- brass or copper tubes;
- block of wood;
- silicone or fluoroplastic as a sealing material.
The drawing of the device consists of a body in the form of a pipe ending with a nozzle. On the other side, a gas supply hose is installed. The nozzle is equipped with a divider to adjust the flame.
A do-it-yourself gas torch for soldering is made in the following order:

- A tap is attached to the tube using silicone.
- On the other side, the tube is plugged and a 0.2-0.3 mm hole is made in it. For this, a special drill and chuck are used.
- After this, the burner is clamped in a vice and the hole is flattened to 0.1 mm using a hammer.
- All burrs are removed with sandpaper.
The divider can be made from a brass tube that is larger than the diameter of the burner. The fastening is parallel to the body. The system will operate on the principle of a tourist stove. In the place where the gas leaves the nozzle, a vacuum is formed and air is sucked in.
Device using two needles
A miniature propane torch is made by hand from 2 needles. One needle can be taken from the pump and the other from the syringe. You will also need two droppers and a compressor from the aquarium. The device is connected to the canister for charging lighters. You will also need copper wire.
The temperature in such a burner reaches 1000 degrees. It is made in the following order:

The gas coming from the can is mixed in a thick needle with air coming from the compressor. The composition of the mixture is changed by regulators.
If there is no compressor, you can replace it with a plastic bottle:

The burner is ready for use.
Design of a device with piezo ignition
 A portable gas burner with piezo ignition for soldering is characterized by the formation of a stable flame torch. The device consists of a cylinder containing gas. A nozzle is installed on top. It is attached using an adapter hose.
This design does not require heating, it does not become clogged and odors do not accumulate in it. It has small dimensions, weight and cost.
The purpose of piezo ignition is to automatically ignite the fuel. This is convenient if you don't have matches. However, this is also the most vulnerable part of the structure. At proper care it will last for a long time.
A gas torch for soldering at home is a necessary thing. It can be used to repair copper and brass items. These are parts that make up radiators and heat exchangers. The device is of great help during car body repairs, when high temperatures can cause warping of the metal.
In just two decades construction technologies updated, new building materials and tools appeared. For example, the old faithful roofing felt has given way to new fused roofing materials, which are better in all respects. No one will argue with this anymore. And accordingly, the bucket with hot bitumen and a brush for coating has gone into oblivion, instead of which builders today use a gas burner for roofing work.
What is a gas burner
This hand tool connected to a gas cylinder. It includes:
- An injector, inside of which a nozzle with a through hole of small diameter is installed. Through it, gas in the form of a flame is supplied to the place of surfacing or drying.
- Cup. This is a device within which flammable gas is mixed with air (oxygen). The glass has many holes through which air is sucked into the flame zone. In addition, this device protects the fire flame from the effects of wind.
- A valve that opens the gas supply and regulates its pressure and, accordingly, the length of the torch.
- The main pipe that separates the torch from the handle that the welder holds.
- Handle made of plastic or wood.
Of course, to operate a gas burner, you need a hose connected to the cylinder and a reducer that reduces the gas pressure in the line. The gas pressure at the burner outlet is 0.1-0.15 MPa. A propane gas burner for roofing weighs a little, in the range of 1.0-1.5 kg. So it is convenient and easy to work with it.
How to make a burner with your own hands
In principle, the design of a propane gas burner is simple. The main thing is to assemble the nozzle and glass. The remaining elements and parts are ready-made units and parts that are sold in any hardware store. Therefore, it will not be difficult to make it yourself.
So, what is required to assemble a burner with your own hands?


Gas burner assembly
First of all you need at one end copper tube slice internal thread using a tap of the appropriate diameter. Copper is not a very hard metal, so it will not be difficult to carry out this operation with your own hands. It will also be easy to screw in the jet.
With a glass everything is more complicated. To do this, you will have to cut one side of the pipe into several longitudinal petals (6-8 pieces), and then bend them towards the center. You will get a cone, but there is no need to bring the petals to the end; you need to leave room for the main tube, onto which the glass is placed. After which the petals are pressed against the tube, where they are sealed. There are slots between the petals that will serve as air supply inside the nozzle. The length of the petals is approximately one third of the entire length of the glass.
Important! The jet should be located at a distance equal to length petals. That is, a flame of propane and oxygen should form at the level of the slots.
The gas burner for roofing work, or rather, its front part in the form of a nozzle is ready. All that remains is to assemble the back part. To do this, you will need two M25 bends made from a pipe with a diameter of 25 mm with threaded threads. In a one-way bend, in a place where the thread is not cut, a cone is formed into which the rear part of the main tube is inserted. This can be done by heating the squeegee with an oxygen torch and tapping it on all sides.
A gas control valve is screwed into it. The second connection, it is double-sided, is screwed into the valve on the other side. Be sure to wrap it on a sealing material. For example, on fum tape. An adapter from threaded connection to the hose. There is no point in making it yourself, because it is sold in any hardware store and is very cheap.
Now all that remains is to make the handle and install it on the prepared device. There are a huge number of handle options. The main thing here is to hold everything comfortably homemade device. For example, it can be cut from wooden board 5 mm thick, you can buy an ax handle and adjust it to the size and shape. It is better to attach the handle to the brackets, because this is the strongest section in the entire structure. Optimally, this is a rear drive, because the control valve should be located slightly in front for ease of use.
There are different ways to attach a piece of wood to a metal tube.
- Make a recess along the entire width to fit the diameter of the pipe of the squeegee, place the squeegee in it and secure it with two clamps made of metal tape.
- Install the squeegee on the side of the handle and also secure with clamps.
So, you have made a gas burner for roofing work yourself, you can connect it to gas cylinder and carry out testing. To do this, the hose is connected to the cylinder through a reducer, where it is secured with a clamp. Its second end is threaded into the adapter, where it is also secured with a clamp.
The cylinder opens, the propane supply opens through gas reducer. And the last thing to open is the control valve on the injector. Gas should flow through the nozzle with a characteristic sound. You must wait until the air inside the device is completely released. After which the gas flow is ignited. The valve near the handle regulates the length and power of the torch.
Attention! A homemade gas burner for roofing work is a high-risk device. Therefore, all operations performed must be approached with special care. This is especially true for the connections of all elements with each other. Complete tightness must be maintained.

Fire safety measures
Regardless of whether a factory gas burner is used or a homemade one, fire safety requirements must be strictly observed.
- Keep a fire extinguisher on the roof when performing roofing work.
- All work is carried out only during daylight hours.
- On the roof when laying soft roof Using a gas torch, you can only carry one propane cylinder.


