You started a renovation and decided to give the walls in your home an unusual look that creates a cozy atmosphere. Beyond choice color scheme, you can give the walls an original texture.
DIY textured roller
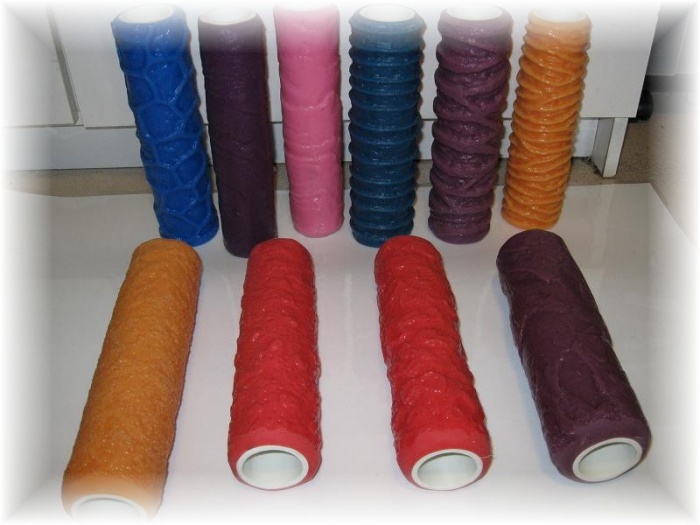
Textured plaster can transform the look of your room. To do this, you will definitely need a special textured, or structural, roller.
These rollers are from various materials(rubber, wood, linoleum) are presented in an assortment on the shelves of hardware stores.
Rollers with a textured surface are used to apply relief on wet plaster; the depth of the relief should not exceed five millimeters. When working, the roller itself must also be wet.
But you can make this tool at home. For manufacturing you will need the following materials: - a used but working roller; - a clothesline or thin cord (half a meter will be enough); - plastic bag;- tape;- knife;- scissors.
Try several options with different decorative patterns on a small area of the wall and choose the most suitable one.
First option
Designer roller made from clothesline. Wrap the old roller with rope or cord. A roller made in this way produces a regular pattern with clear lines. A distinct rhythm of texture is created, which you can control by making different numbers of passes.
The type of pattern can also be adjusted by the thickness of the rope being wound, the direction and frequency of winding. This roller creates a pattern of depressions.
Second option
If you have a foam roller left over from previous repairs, you can put it to use. The foam roller will create a pattern with bulges.
Using a knife, make several cuts on the roller. You can use scissors to make cutouts. The wider the cut, the wider the bulge will be, building the pattern. You can combine the types of cuts on the roller, and you can also come up with your own application methods.
You can make a textured roller with your own hands from a roller with a soft sleeve by tying the surface of its sleeve in several places with thread. Use a knife to draw a pattern onto the foam roller.
Third option
A very simple way to create delicate reliefs on plaster is to use a roller wrapped in a plastic bag. Secure the bag to the roller with tape. You can also wrap the roller with twisted tape or a twisted bag. The folds of the bag create a very fine irregular pattern, and the number of passes with a roller changes it endlessly. Like a plastic bag, you can use scrap fabric, vegetable netting, thick hair bands, leather straps, and stiff, crumpled paper. It is also very interesting to experiment with different combinations of materials.
Add a room stylish design and rollers for decorative plaster. It’s amazing that such an accessible and familiar tool for leveling walls has become a full-fledged tool for decorative finishing.
 The secret of the transformation is hidden in textured rollers, which allow you to create a figured print on the wall, imitating various types of surfaces, for example, the texture of stone, wood, leather, “fur coat”, etc.
 Using shaped rollers you can easily create a pattern on the wall
Types of rollers
- For a long time, craftsmen have been working on walls with improvised means: sponges, a comb, a stiff brush. Today, an assortment of construction tools for decoration allows you to find a roller with a ready-made relief that suits your design, which, after processing the plastered wall, turns it into real three-dimensional images. Roller cylinder coating variations:
- rubber;
- foam;
- plastic;
- tree;
- silicone;
- textile;
 leather.
 Before choosing a roller, you need to decide on the desired pattern on the wall
Tools with a soft surface, such as fur, create a “fur coat” effect on the plaster. The marble finish is obtained using a fabric roller with a crinkled cloth, and the finish, like natural stone, is given by a leather surface. As a rule, such rollers are used when you need to process a painted surface. Standard foam cylinders can be modified by winding twine, thread, or pieces of foam to create natural patterns, such as the structure of tree bark.
If you are interested in a more pronounced decor, then you cannot do without rollers with a hard coating. Their cost is an order of magnitude higher than conventional clamps, but this is due to their high aesthetic value. In addition, they can be used several times. The most productive rubber rollers will be those that can have a convex pattern to create a pressed pattern or a slotted pattern to create three-dimensional textures.
Since such an innovation for decorative plaster came from Western countries, then it is in their stores that a variety of textures and patterns reign: leaves, flowers, animals, birds, geometric shapes.
Work with a structural roller is carried out in two ways - first they apply plaster, wait for it to harden for a while, after which they finish it layer by layer or apply plaster to the wall (already decorated with putty in one layer), dipping the roller into the composition. But, basically, the second method is used to carry out patterned color painting by creating imprints with this rubber product.
Stages of plastering walls
 Before applying decorative plaster, the wall must be carefully prepared
 In order for the plaster to last longer and not crack, it is necessary to do a pre-treatment. To do this, the surface of the wall is cleaned of dirt, old wallpaper, dust and a primer is applied to it. Then they are puttyed for leveling. For puttying, spatulas of sizes 300 mm, 450 mm, 600 mm are used. The application of putty should be uniform. And don't push too hard.
After the first layer of putty has dried, it is necessary to apply a second one using a 600 mm spatula. The putty must be applied and smoothed in two mutually perpendicular directions. Next, you can proceed to the decorating process, which consists of the following stages:
- Dry plaster is mixed with water, bringing to a homogeneous consistency.
- Then they apply the mixture to the wall in a layer of 2-4 mm in order to proceed to creating the decor, or more densely if it is also necessary to level the surface. Smooth out with a spatula.
- Allow about ten minutes for the composition to thicken, and begin to roll over it with a textured roller from top to bottom, forming a pattern. It is more convenient to work in pairs, when the first person applies the plaster, and the second creates the relief, for example, a “fur coat”.
- Subsequent treatment of the wall with paint is carried out after 48 hours, when the plaster has completely dried. If you need to paint the entire wall, then buy a roller with a long pile, and to add color only to the protruding parts, use a tool with a short pile.
Principles of accurate drawing
When using rollers for decorative plaster, you must follow several rules:
- The roller should not be pressed tightly against the wall; the movement should be smooth and unhurried.
- The application of the second path of paint begins where the border of the first pattern passes, without overlapping.
- At the ceiling, the roller needs to be slightly pressed upward, but further maintain a low pressure force.
- If the pattern is too embossed, you can smooth it out with a wet sanding mesh.
How to create a “fur coat” surface
A “coated” wall means that plaster is sprayed onto the surface using a broom, brush or a special machine. “Fur coat” is especially popular for facade surfaces, but it will also look interesting indoors. Modern version
creating a fur coat involves using a textured roller, which allows you to make the layer uniform and presentable.
Facade treatment under a “fur coat” is carried out in the same way as in a room. First, putty is applied, plastered and applied over the plastered layer with a lint roller. If a mistake occurs or you see that the plaster is uneven, you should remove the excess with a spatula. It is impossible to take breaks in the process of creating a “fur coat”, otherwise the composition will have time to dry, and the joint will be too noticeable at the edges. The use of structural rollers will allow you to decorate the wall as well as any repair specialist. Decorative plaster has long outgrown its main purpose (wall leveling) and is in a great way to create exclusive interiors
, and even in ethnic style. For textured painting of walls with a smooth and flat surface, it is convenient to use this construction tool
like a roller. There seems to be nothing difficult about using the tool. After all, we've all seen rollers, we've all used them or watched others use them. However, it should be taken into account that they are various types and are issued for specific purposes. This can make it difficult to choose when purchasing. That is why this article will give practical advice that will help you choose. You will also find out what types of paint rollers exist, what to look for when purchasing, and what are the features of each of them. We will take a closer look necessary tools for textured painting of walls.

Some information about paint rollers
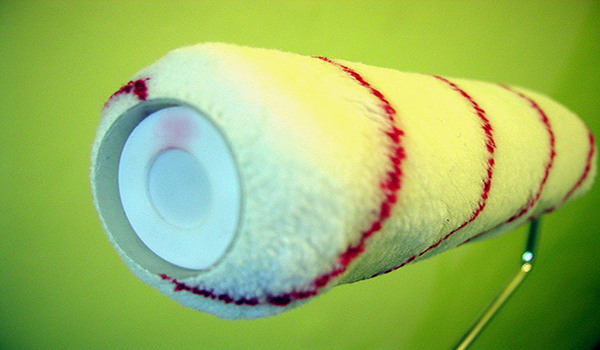
For all of us, this simple tool is not too fancy. Its design is quite simple: the main part of the tool is a roller that rotates around an axis. The surface of the roller is covered with a material that absorbs paint, transferring it to the surface of the walls. To make it simple and easy to work with, a handle - a clasp - is attached to the axis. What is also practical is that such a handle is not permanent; you can replace it for more convenient use.

Differences paint rollers mainly consists of two points:
- The coating of the roller, which is called a fur coat.
- Roller width.
The quality, convenience, as well as the finished result of the work performed depend on such factors. That is why we will consider all its types, so that your work is not difficult, but brings you pleasure.
Fur coat type
Nowadays, there are the following types of this material:
- thread;
- fur;
- foam;
- velor;
- flock and some with a flat surface;
- textured and textured rollers for decorative painting.
Fur
When painting walls, such rollers are universal, since a fur roller can apply any type of paint, even organic-based paint.
Advantages:
- the composition is applied qualitatively and evenly to the surface of the walls, which contributes to easy implementation DIY work;
- absorb a sufficient amount of paint;
- when painting, the composition does not splash;
- Great for uneven surfaces, such as decorative plaster.

Materials from which the bristles are made:
- Natural fur . This material promotes good absorption of paint into the fibers and its distribution on the walls. The only drawback may be that fluff may fall out from time to time and be applied to the surface along with the paint. This often happens with cheap, low-quality rollers.
- Polyacrylic. The main advantage of this material is its relatively low cost. Polyacrylic is worthy replacement real fur. However, it has a significant drawback - it is used for painting walls only on water based, and without any fillers with aggressive substances.
- Polyamidite. Compared to the previous material, this type is more durable and wear-resistant. That is why you can use coats made from such materials for any type of paint. The disadvantage is that when painting the wall, the paint will splatter more.
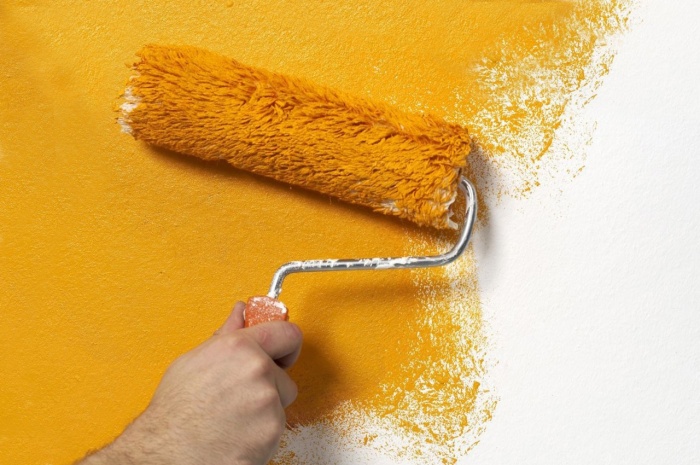
Fur coats can have piles of different lengths. If you need to paint a rough surface, choose a coat with long pile; if you need to paint a glossy surface, use a coat with a small pile.
Advice! To ensure that your roller lasts as long as possible, take proper care of it. After each use of the roller, take the time to wash it thoroughly.
How to do this correctly? First, soak the roller in kerosene and then in plain water. If you used a roller to paint walls with water-dispersion paint, then caring for the tool will be even easier. To wash it, simply use a hose with water pressure.
Velor
This type of painting is a pleasure to perform, as it is applied in a beautiful, even layer. If the surface has been previously well prepared, the painted surface will look completely smooth.

Often, sellers in construction stores say that such a tool is intended for specialists. Why? Because if you work carelessly, all defective places will be visible on the surface. Another disadvantage is that the fibers of the fur coat do not absorb a large number of paint, which will force you to regularly wet the roller.

Foam rubber
The main advantage of this material is its price. For example, foam products can cost from 30-40 rubles. Such rollers can be used to paint walls with water-dispersion paint. Among the disadvantages, the following points can be highlighted: does not paint well uneven surface, short-lived, splashes paint. But, despite such minor shortcomings, this roller is not the worst option, especially when painting a small area. For example, walls in the kitchen or bathroom.
Rollers for decorative painting of walls
What does the concept of “decorative painting” mean? First of all, this is the application of patterns and drawings to the surface of the entire wall or to a specific place.
To perform such work, there are two types of rollers:

Such a structural roller can apply a beautiful pattern to your wall. The photo shows what the finished result looks like.

Advantages of textured finishing
When decorating walls indoors, it is worth imagining two varieties - the use of special textured paint or use different technologies finishing. In using the first option, you will have to go to a hardware store and choose a special paint that contains acrylic components. When finishing, this paint spreads unevenly on the surface, so you can get a granulating effect.
Textured painting of walls has many advantages: the work can be done with your own hands, without having any special construction skills, such a finish masks all unevenness well, the paint is non-toxic, prevents the formation of mold, and is resistant to mechanical damage.

There is another option for decorating - painting the walls using stencils. This painting is done with a water-based substance. This finishing method has the following advantages:
- low cost of work;
- allows you to draw in those places where you like;
- large selection of colors;
- the ability to do the work yourself, etc.
Tools for applying textured paint
So, what do you need to do decorative wall painting? These are the following tools:
It is clear that you will not use everything from this list. But these are all devices that can be used to get the job done. However, it also happens that it is not possible to spend your money on various expensive rollers. What to do in this case? Don't panic, because this moment you can show your imagination and make your own original design premises.

Using a homemade tool
In order to make a textured roller, you need to tie or glue pieces of foam rubber, fabric or cellophane onto a regular one. After completing this procedure, you can use such a roller to apply a water-based composition to the surface of a wall or ceiling. This decor option will look very original and aesthetically pleasing. You can also use wire wound on a roller.
Is it possible to apply plaster with a roller? This is a question for amateur finishers who plan to do the repairs themselves. Professionals say that it is possible, since such work does not require special construction skills. You just need to know how to choose and use the material and tool.
Decorative plaster under the roller should not contain large fractions, since such a product is applied with a spatula. Professionals advise using a ready-made composition. The product is easy to apply, and even non-professional craftsmen can work with the product. The finished composition will also not change color after drying, unlike dry mixtures.
Types of plaster
Roller begins with the choice of material and tool, but before that you should familiarize yourself with the concept of “decorative plaster”. This product contains various fillers. The most commonly used materials are wood fiber and stone chips. Acrylic and polymer substances bind the components. Such components are also responsible for the elasticity and drying speed of the product.
There are several types of material suitable for this tool.
Structural plaster
This material forms a smooth coating on the surface. To apply the product, use various tools, including rollers for decorative plaster. The structured product is usually available in light shades. To add color, a special color is used, which is mixed with the material before application.
Venetian plaster
It is a product containing marble flour and water emulsion. The advantage of the material is that it can be tinted in any tone. Before using the product, the surface is leveled. Venetian plaster creates a coating on the building base with the effect of marble, leather, granite, cork, etc. The product is environmentally friendly and water resistant, therefore it is used for decorating surfaces in rooms with high humidity(bathroom, swimming pool and others). The disadvantage is the high price.
Textured plaster
This product forms a relief on the surface immediately after application. This result is achieved thanks to the granules that are part of the product. Based on this, the material is classified into large, medium, fine and fine texture. As the video tutorials show, applying textured plaster with a roller is a simple process, but requires careful study.
Types of rollers
Tools for decorative material are divided into several types.
By type of roller material
From work surface The roller depends on the final finishing result. Classification of tools by type of material:
- Rubber rollers. Such tools require skills in repair, so the devices are not recommended for use by beginners who do the work with their own hands. The rollers form a clear texture on the surface thanks to the protrusions and recesses located on the roller.
- Wooden tools. Suitable for non-professional finishers, since, unlike rubber products, plaster sticks little to the surface of the roller. Disadvantage: short operating period. Over time, the wood swells and peels off, rendering the instrument unusable.
- Plastic rollers are budget tools. This is the only advantage. Disadvantages - they are deformed upon contact with the material, cracks appear on the roller, which negatively affects the final finishing result.
- Leather tools. These rollers are used for applying Venetian plaster. The tool helps create a marble effect on the base. Professionals advise using a roller with a natural surface, not artificial leather. This roller has a longer service life.
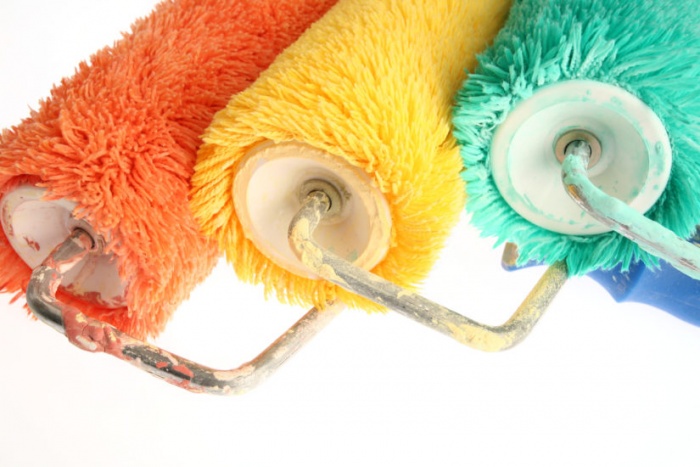
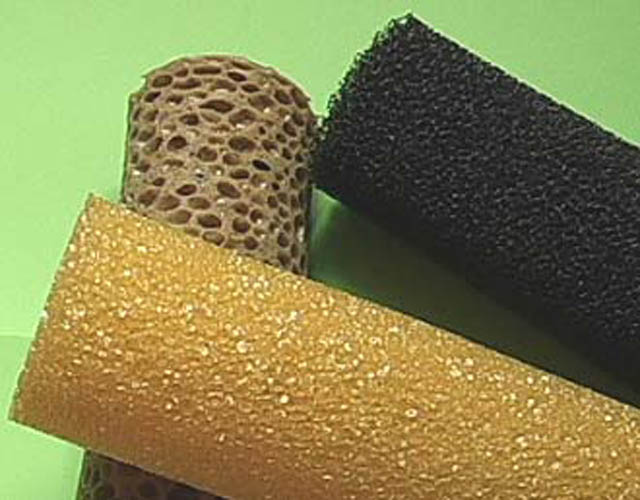
- Pile tools. The surface of the rollers is made of natural or artificial fur (as in the photo below). The final result of finishing depends on the length of the pile - if it is short, the surface will be smooth. When choosing such a tool, you should pay attention to the quality of the fur. If hairs fall out of it, they will settle on the surface, which will spoil appearance finishing.
There are also foam, foam and fabric tools, all of which create texture on the wall.
By type of pattern
Based on the type of final pattern on the surface, tools are classified as follows:
- Textured rollers. Such devices create an imitation on the surface natural stone, fur, leather, etc. The relief depends on the surface of the roller. For example, for marble, a tool with a leather base is used. Textured plaster, applied with a roller with a long-pile surface, creates a “fur coat” relief. To obtain a convex pattern, it is recommended to use a tool with indentations on the roller, and for a depressed relief, a roller with a protruding relief.
- Structural tools. Such rollers are used to give the coating a relief. The picture on the video is clear and closed in a circle. Thanks to this tool, the effect of voluminous wallpaper is created on the surface. Video tutorials demonstrate that decorative plaster is applied with a structural roller to a prepared building base.
To size
Types of rollers by size:
- short – roller length up to 30 cm;
- medium – surface length 30-50 cm;
- long – from 50 cm.
How to make a roller for decorative plaster yourself?
Methods for making a roller:
- Wrap the rubber roller roller with a rope made of the same material. Perform the turns in a chaotic manner. To keep the tourniquet securely on the roller, secure it with glue. Such a roller will create an imitation of wood on the surface.
- Roll up a rope from any fabric. Lubricate the surface of the roller with glue. Wrap the tourniquet around the roller. With this tool, an imitation of wood is also created on the surface.
- Apply glue to the roller. Wrap around the roller whole piece fabrics. Such a tool will create a textile texture on the surface.
- Cut out the elements of the future pattern from foam rubber. Apply glue to the pieces and secure on the roller.
- Apply glue plastic film or any mesh. Glue the material to the surface of the roller.
Rules for applying the material
Textured plasters applied with a roller create unique reliefs on the surface. For achievement best result Experts advise adhering to a certain algorithm of work.
Preparing the construction base
Remove the base from the old coating. To make the work move faster, craftsmen advise using special liquids and solutions. After dismantling the wallpaper or paint, tap the building base with milk to check for hidden defects. If differences are detected, cut off the irregularities. Then degrease and remove dust from the surface. Apply primer to the walls. Fill all defects with putty. After this, apply the material to the surface. Wait until completely dry, clean the base and prime.
Application of the solution
There are several ways to apply decorative plaster with a roller. The choice of method depends on the tool used and the final finishing result.
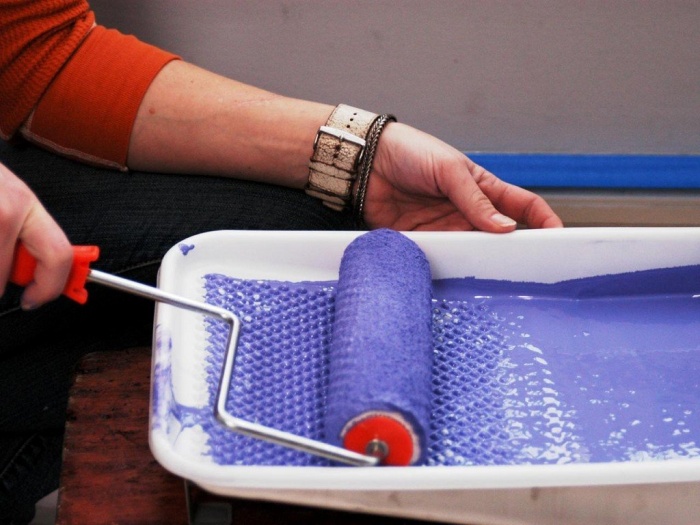
Applying the solution with a textured roller:
- Pour the solution into a special cuvette. Immerse the roller in the product and squeeze out excess material.
- Apply plaster to the wall from top to bottom. For subsequent treatments, do not change the direction. Do not remove the roller from the base until the end of application. If it moves away from the surface, the drawing will not work. Do not press the tool against the wall too tightly, but not too loosely.
- Apply the next strip close to the previous one. Do not apply the material at intervals or overlap.
- Textured plaster is applied using a roller in one layer. For this reason, the thickness of the material should be the same in all areas.
Algorithm for applying plaster with a structural roller:
- Apply working material to the surface. It is recommended to use a spatula for this.
- Wait until the product hardens a little. Do not use a structural roller on liquid putty. The tool will not leave a mark, since the composition will clog the pattern on the roller. You also cannot wait for the composition to completely harden. The drawing will not work on a hard surface.
- Fix the roller on the wall under the ceiling, press its surface and move it down without lifting it from the base. Try to ensure that the pressure is the same throughout the entire area.
- Make the next strip of the pattern close to the previous application. The drawing above should begin with the same fragment as in the previous processing. Do not allow discrepancies, otherwise the pattern will not work.
- After completing the relief, paint is applied to the surface if a solution without color was used. To do this, wait until the material has completely hardened. After this, paint the surface.
Instructions for applying two-color plaster:
- apply one-color plaster to the surface - this will be the main color of the coating;
- prepare a solution of medium thickness consistency and mix the product with the color;
- Using a roller with a soft roller, apply the solution to the surface with chaotic movements.
The video in this article demonstrates how to properly apply decorative plaster with a roller.
Using a roller and decorative plaster, patterns are created on the surface that are striking in beauty. The main thing is to adhere to the rules of work.
There is a large number facing materials, which are widely used today to create beautiful interior indoors. One of the most popular finishes is decorative plaster. There are many known varieties of it, for example, textured painting of walls. To perform this work, a special roller is required, which gives the entire cladding a special texture. In this article we want to tell you about the necessary set of tools that are required to apply textured paint.
Types of rollers
If you go to the store to buy a texture paint roller, you may come across a wide variety of this tool. Therefore, we invite you to briefly consider its existing varieties. First of all, let's define what a roller is. By roller we mean a roller that rotates around its axis. As a rule, a metal base is used, on which replaceable rollers are placed. As for the roller itself, it can be covered with a variety of materials. To make it convenient to work with the roller, it has a special handle.
If we talk about the existing differences of this tool, we can highlight the following:
- Type of coverage.
- Roller width.
So, when choosing a roller for painting walls, it is extremely important to build on these indicators. So, now let's look at the existing coverages that are used when performing various works.
Types of coatings

So, several types of so-called roller coats are known. It is made from the following materials:
- Foam rubber.
- Threads.
- Velours.
- Textured or textured.
- Flock and others.
Let's look at the features of the most popular ones on the domestic market.
Fur roller

Fur rollers are universal for painting walls. You can absolutely paint walls with them. different colors. These can also be paints that have an organic base. There are a number of positive aspects of such rollers. When working with them, moderate absorption of paint is observed. As for applying the paint itself, it applies evenly. Therefore, they are very convenient even for non-professionals. It is also important that they do not splash paint all over. And if there are minor irregularities on the walls, then there are no particular difficulties here either.
The fibers themselves on the fur roller can be made from different materials, For example:
- Natural fur. Natural fur fibers perfectly absorb paint, which promotes uniform distribution of paint over the entire surface of the wall. If we talk about shortcomings, then it is the only one - during the painting process, there is a loss of lint. And if you bought an inexpensive roller, then this can become a real problem, since lint will remain on the wall, which should be removed urgently.
- Polyacrylic. This is an excellent replacement for natural fur, since such a roller is devoid of its disadvantages. And if we talk about its merits, it’s quite. But a polyacrylic fur coat has its own characteristics. You can paint with this roller only with water-based paints. Also allowed is the paint that contains minimal amount aggressive substances. Plus, polyacrylic itself is short-lived.
- Polyamide. This material is wear-resistant. It also copes with harsh environments. As a result, such a roller is suitable for absolutely any type of paint. But there is one important drawback. When working, they constantly experience splashes.

There are also some differences between these wall paint rollers. For example, a fur coat may have different lengths piles.
Advice! If the wall is rough, then it is recommended to choose a coat with a longer pile. Due to this, you can cover everything with high-quality paint.
So, regardless of what material the pile is made of, the roller requires care. And you don’t have to make any special efforts for this. For example, it is enough to soak it in water after work or in kerosene.
Foam roller

A foam roller is the cheapest. You can buy it starting from 30 rubles. This roller is used for water-dispersion paint. This is the paint that is used for processing window frames or doors. Of course, a foam roller has obvious negative sides, among which:
- Short service life.
- If you start working with particular intensity, be sure to expect splashes of paint in all directions.
- If the surface is relatively uneven, then painting it properly will be problematic.
So, a foam roller for painting walls is an economical solution for a small area of work. If you have a large area to paint, then don’t even think about buying it. Moreover, it is not suitable for a wall covered with decorative plaster.
Velor roller

This tool allows you to apply paint in a thin and even layer. As a result, the painted walls will be smooth. But the final result will largely depend on how well the base wall was prepared.
To work with a velor roller you need special skills in painting walls. A small defect in movement can lead to an immediately noticeable defect on the wall. Therefore, it is not surprising that such rollers are used mainly by professionals in this profile.
To be objective, this tool also has disadvantages. The velor itself absorbs a large amount of paint. As a result, you have to wet the roller much more often to achieve a good result. This leads to increased paint consumption.
Rollers with a smooth surface

There is another variety of this tool, which has a very smooth surface. It is made from:
- Flock fiber.
- Polyester.
In the first case, flock fibers are made from polyurethane. The base is fabric. This coating has high strength. Due to this, a long service life is observed. They are used to paint a perfectly smooth surface.
As for the tool made of polyester, it feels like padding polyester. This roller has excellent positive characteristics, including:
- Absorbs paint perfectly.
- Perfectly conveys the tone of the paint on the wall.
- The possibility of transfer of lint to the painted wall is completely eliminated.
- Long service life.
So, here we have looked at the important features and differences of the tool that is used for painting. Now let’s find out what is different about a textured roller for painting walls, which is used for textured painting of walls.
Decorative paint roller

By such a tool we mean a roller, with which textures, patterns, and the like can be applied to the surface of the wall. There are two main types of it:
- Textured roller. The required pattern is applied to its surface in advance.
- Structural roller. In this case, there is also a three-dimensional pattern, but the task of which is reduced to applying a texture or pattern.
The texture of the wall can be created not only with a special tool, but also with ordinary rollers. So, you can use special paint for decorative processing walls and roll a foam roller over it. The effect can be original. In fact, there are no strict requirements or rules here. You can experiment with different types coatings.
As for relief rollers, they can be made from a variety of materials: polyurethane, foam rubber and rubber. You should choose the one that will allow you to achieve the maximum desired result. Many people prefer polyurethane products, thanks to which they can give the wall an original appearance.
There are also original rollers based on leather and fabric. They are a tampon with folds. Their use allows you to achieve an original and non-standard texture on the walls. For example, some have learned to create the effect of marble and other materials.

Using a textured roller requires special care. When working, they need smooth and unhurried movements. It is also necessary to apply uniform force to the surface so that the paint is evenly distributed over the entire surface. Also, due to this, the texture will be beautiful. But remember one important nuance, textured paint is applied with a special spatula, and the texture is formed by pressing the roller.
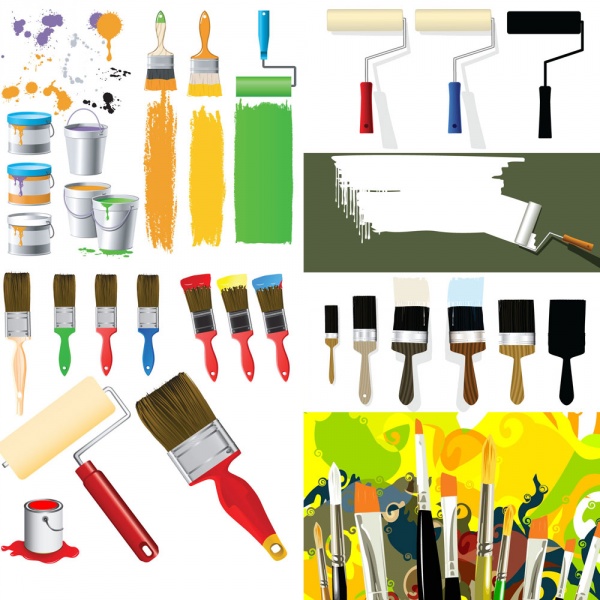
Among other things, an additional set is required necessary materials for decorative painting of walls. To do the work yourself, you should prepare the following set of tools:
- Textured or textured roller.
- Brush of different sizes.
- Protective gloves.
- Mask to protect the face and respiratory tract.
- Rags.
- Sandpaper.
- Means for mixing paint.
- Metal brush.
- Disc brush.
- Thermal gun.
- Special spatulas for applying a decorative layer.
- Spray.

It is worth noting that this is a basic set of tools. And it’s not a fact that you will use all of it. However, all of the listed tools for painting walls may be useful to you to one degree or another. Moreover, some home craftsmen decide to replace the basic tool for textured wall painting with a homemade one.
You can use cellophane, leather, fabric, foam rubber or something else as a basis. It's good if you have a base for the roller. You can glue any of the listed materials on top of it.
Conclusion
In general, applying textured paint to walls is creative process, which requires the use of your imagination. Although a special tool is provided for creating texture on the walls, there is still an opportunity to experiment. You can try a variety of rollers to add some flair to your wall coverings. Of course, try it on a small sample first so you can test your know-how.
We hope that this material was useful to you and that we were able to figure out what kind of tool you need to apply textured paint to walls. In addition to everything, we offer viewing of the prepared video material, in which you can clearly see how to correctly use the selected tool.


