Working with a wood router is similar to working as an artist. The raw timber will become shaped railings. Instead of plastic factory window sills, you can make wooden ones with a beautifully milled end.
And the possibilities of restoration old furniture almost limitless. Any cabinet, bedside table or stool made of solid wood can acquire new life in the hands of a master who knows how to work with a hand-held wood milling machine.
Principles of working with a router for beginners
In this part of the material we will look at the basic principles of working with a router for beginners. Let's talk about mistakes and ways to avoid them. About the features and differences of this tool from others.
What is the difference between a router and a drill?
A cutter has a larger contact area between the cutting edge and the material than a drill. The rotation speed of the tool is much higher compared to a drill. The maximum rpm of the router is more than 25,000, and sometimes even more than 30,000.
Revolutions
Most woodworking electrical tools operate by rotating a shaft. A hand router is no exception. The cutter is fixed in a spindle (chuck), which rotates at high speed using an electric motor.
This allows the surface to be treated to be smooth and prevents chipping. Inexperienced craftsmen advise purchasing a tool with maximum number revolutions, mistakenly believing that this improves the quality of work. In fact, optimal choice there will be a milling cutter with adjustable shaft speeds.
Milling cutter with speed control
Each type of cutter, and especially different types of wood, requires its own rotation speed. If the speed is insufficient, the surface will be loose and will require additional processing. sandpaper.
If the speed is too high, chips and gouges may form, and the wood at the point of contact with the cutter may become charred. Give advice on choosing optimal speed pointless, need to try it different variants
on unnecessary workpieces. In addition, each master has his own secrets, which come only with experience. Same tool, speed and material, in different hands
give different results. IMPORTANT! When choosing a speed, there is one thing - the number of shaft revolutions is inversely proportional to the working diameter of the cutter.
That is, the thinner the cutter, the higher the speed.
The router is a multifunctional tool that performs many different tasks:
- Edge processing.
- Selection of grooves - blind and for a tenon, etc.
- Milling of various profiles. Specialized cutters for corner jointing or a frame cutter are used.
- For lining facades and much more.
There are several types of milling cutters: universal (the most common option) and specialized ones, which are designed to perform one operation, for example:
- filler;
- lamella
Why do you need a speed controller?
Modern models Almost all are equipped with a speed controller. It is needed to change the rotation speed of the equipment depending on its diameter and area of contact with the material.
The larger the diameter of the cutter, the lower the speed. Some models have a diameter matching plate cutting tool set speeds.
What determines the quality of processing?
The quality depends on the rotation speed and linear speed movement. The larger the cutter, the slower you must move the router across the workpiece. Accordingly, the smaller the cutter, the greater the speed of tool movement.
You need to move the tool along the surface of the workpiece evenly and in one movement. If you stop, you will immediately develop a burn that will be difficult to remove by grinding.
An irrational increase in rotation speed will lead to excessive load on the engine, which in turn will affect the quality of the treated surface.
Chipping and scuffing may occur. Choosing the right speed will come with experience.
First steps, where to start?
Let's start our acquaintance with the collet. The most common collet clamp is the 8 mm one. On more powerful models they install 12 mm and less often, mainly on imported models inch dimensions, ¼ and ½. Also, do not forget about preparing the workplace, if so, then this the best option.
It is very important to properly clamp the cutter in collet.

It is important to insert the cutter correctly into the collet clamp
It should go at least all the way to its end, maybe a little deeper, but no less. At high speeds, the cutter can be torn out and then it will fly like a bullet.
Any cutter has a strictly directed rotation movement, always clockwise. In order not to make a mistake when processing a workpiece, we mark on it the direction of movement of the tool with arrows.

Marking the direction of processing
We installed the edge molding cutter and clamped it well in the collet. Next, we set the milling depth; on such cutters it is set immediately.
Beginning craftsmen who have just begun to get involved in such an interesting and difficult task as making furniture and other wood products are often lost and cannot understand what tool they need in this or that case. Yes, and understanding the rules of their operation completely independently is very problematic. We invite you to read a short instruction about one of the most indispensable tools in carpentry.
The main types of attachments used when working with a wood router and their purpose
There are only two main types of cutters, the division of which is based on the place of their use:
- Edges.
- Grooved.
Each of these species has a wide range of subspecies used for different purposes. The main difference between the main types is that the first has a guide bearing that rests against the edge of the part and prevents the nozzle blades from jumping off further than necessary. In the second type, this element is absent, so it can be used on any part of the product.
 main types of cutters for a hand router
  types of cutters for a hand router part 3
The following edge attachments exist:
1. Profile.
They are not used to create elements responsible for the integrity or strength of the structure. Their purpose is to create purely decorative elements and decorate the edges of the product.
2. Cone.
Most often used to smooth out sharp edges. They cut a rectangular edge at a 45 degree angle.
3. Moulded.
Just like the previous option, they are used to smooth corners. Cut off the edge and turn it into a quarter-circle profile. The radius of the nozzle can vary from 3 mm to 1.6 cm.
4. Disk.
It is used when it is necessary to cut a straight recessed groove with the same width along the entire length.
5. Folded.
Necessary in cases of creating a rectangular edge along the edge of the product.
6. Fillet.
They have a strictly decorative purpose, creating rounded depressions along the edge.
Types of cutters for a hand router, part 2: working with a wood router; a hand router with a set of cutters
The following cutters are classified as slotted cutters:
1. Rectangular.
Most manual videos show the use of these particular attachments. With their help, smooth rectangular channels in the product. Used to create connecting grooves.
2. Fillet.
Cut out smooth channels with a rounded bottom. By by and large are used for decorative purposes only.
3. Triangular (V-shaped).
When working with a wood router with such an attachment, smooth channels are cut out in shape resembling a triangle, the top of which is directed deep into the product. Best suited for cutting groove joints on thin workpieces.
4. Dovetail
They cut out channels whose bottom is wider than theirs. top part. With their help, very strong groove joints are made.
A training video about working with a hand router that will help you avoid mistakes
After watching a video about working with a hand router, you can easily figure out how to properly set up the tool, how to adjust the seating depth and the location of its cutter. In addition, you will learn safety rules that must be observed during work. Now let's look at other important nuances.
Tool movement direction
When working with a milling machine, many craftsmen do not recommend using this method, since there is a high risk of the tool coming off the workpiece. But he is the most the best option, which will help avoid fiber splitting, as well as pressing the edge of the product, which does not need processing. The attachment rotates clockwise, which means the tool should go counterclockwise. When moving in the direction of movement of the blades, there is a high risk of the above-mentioned problems occurring.
Nozzle rotation speed
This tool operates at fairly high speeds. But depending on what kind of wood is processed and what size of nozzle is used, the rotation speed will be selected. The softer the wood, the higher the speed selected. How larger size nozzles, the lower the speed will be. Exact indicators are usually given in the instructions.
Working with this tool is not that difficult, and in return you will get the broadest opportunities. They can successfully replace even special professional equipment, which is used in large factories.
All woodworking enthusiasts are usually intimately familiar with such a device as a wood router. Using it, you can perform unusual products, and create small ones with your own hands decorative elements. You can do wood carving using a hand router, and without putting much effort into it. But for beginners, before starting to work with such a device, you need to gain some knowledge and become familiar with the basic rules in order to use this machine.
Getting to know the router
Using a milling machine, you can work with materials such as wood and metal. With its help it is easy to create small elements, for example, grooves, ridges, recesses. They can be either stationary machines or manual, having a small configuration. To work with a router at home, it is very convenient to use the manual version.
The milling cutter is a small body equipped with a motor. There is a special holder on the case, and small adapters are inserted into it, with the help of which the device can be used with different diameters shanks.
The milling cutter is also equipped with a platform connected to the body with rods. On its lower part there should be a special sliding base, which ensures a smooth movement of the tool while it moves along the part. Naturally, each device is equipped with a power button and a lock button.
To ensure that the milling machine does not malfunction during operation, it is necessary to periodically change the lubricant in it and keep it clean.
How to operate the machine
Working with a manual wood router begins, first of all, with setting all the basic parameters. First, the required rotation speed is determined, and it will depend on the material with which the creation will be made. After this, the cutter is installed. As a rule, on cutters, marks have already been determined on which to rely. The cutter is inserted to the specified depth, then the shaft is secured and tightened with a wrench until it stops.
But not every device has a locking button, so if it is missing, then to make the planned task easier, you will need another key, which will hold the shaft. Here you will need to rely on the model of the device. For example, a Russian milling machine, presented in an expensive model, will have, in addition to a locking mechanism, also a ratchet.

The tool is capable of milling wood to a certain depth, everything will depend on the overhang that is installed on it. For the manufacture of some parts maximum depth is not needed, then it is configured. This can be done using a revolving stop, step by step:
- necessary Smooth surface, on which the device will stand, and the clamps on it are released,
- the turret stop lock is unscrewed, as a result of which it is released,
- the required stop leg is selected, depending on the required milling depth,
- The rod is raised to the selected depth, and then the stop lock is lowered.
On more expensive milling machines To make them easier to use, there is a special wheel for adjusting the depth of the milling process.
Types of cutters
Not a single milling machine can do without its main component - the cutter, which is the main working part. They vary according to:
- size,
- constituent material,
- form.
If the work will be done with wood that has a soft density, then lightweight materials are needed for the cutter. And for wood with a high density, you will need a stiffer cutter.

What types of cutters are there? They are distinguished:
- Disk,
- Profile,
- Cone-shaped,
- Rectangular.
These are their main varieties. But besides this, they come with or without bearings.
What can you do with a router?
The milling machine is powered by electricity, so it can perform many rotations in a fraction of a second, while performing difficult work: Creates recesses of specified dimensions. Using this tool, you can do:
- decorate any wooden products,
- make various recesses and holes, for example, for awnings,
- create exclusive items by applying various patterns to the surface of the product.
Any recesses created by a router, as a rule, represent a separate part of the structure, which is a decoration of the object.

To ensure that working with the tool has as few errors as possible, you need to follow some rules:
- On work surface a ruler is installed for the part that will be manufactured.
- When work is done with parts of variable profile, the rulers are attached perpendicularly to the surface.
- When the actual work process occurs, it must be taken into account that the device must be rotated in the opposite direction from the rotation of the cutter. Otherwise, it will cause inconvenience and you may get injured.
Learning to work on wood using a hand router will not be particularly difficult. Watching the course will help with this: “work manual machine Wood router video lessons. The main thing is to follow the prescribed safety precautions and learn the basic technology of working with the tool. Then, even beginners in this business will be able to perform original and interesting work.
Video: wood carving on a milling machine
In order to ensure the normal operation of the milling machine, it is necessary not only to handle the device used correctly, but also to correctly use, in other words, devices for this tool had the opportunity to shape the blank product in accordance with the requirements of the master (that is, cutting off the edges and other places of the material where needed, and not where “it just happened”). So, it is precisely to give the processed material a clear planned shape that the farm uses “devices” for a manual milling machine.
The difficulty of making homemade devices
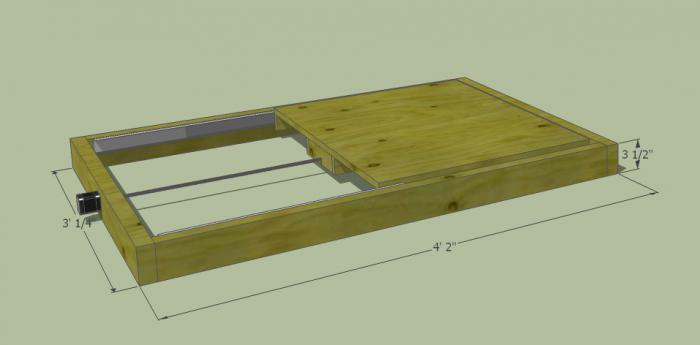
Often, manufacturers themselves complete their products at the production stage, but with a full set of all necessary tools, alas, not every company will be able to please consumers. And why do this if at any time you can make a suitable tool with your own hands in a garage. This can be done even without a preliminary drawing: their design is so primitive that even a novice master can cope with such work. To make a parallel stop or any other part, it is enough to have a drawing of this device and a minimum set of tools. But if you want to make homemade table for a manual router, you definitely can’t do without a drawing. You need to calculate everything correctly, indicate the dimensions of the table, and then get to work.
How to work with a hand router?
Before carrying out milling work on wood, you need to make sure of the following:
- Is the cutter secured in the collet?
- Does the accessory installed on the workbench match its power and speed?
- Is the required milling depth set (when working with submersible devices, this indicator is measured using a special immersion limiter).
- When working with it, make sure that a guide ring or bearing is installed that provides the desired trajectory of the device (the thickness of the cutter should be no more than three millimeters).
We pay attention to supports for parts when performing work.
When considering the question “how to work with a manual router,” it is also necessary to note that the part you are processing must always have some kind of support. For example, before the engine is turned on, the edge of the sole or bearing is pressed against a guide piece or template. Only then does the master turn on the machine and begin milling.
Below we will look at what types of tools there are for a router and what makes them special.
Rip fence
The rip fence is one of the few devices that is already included with every router. Therefore, there is simply no need for their independent development and production. As for the functions, with the help of the mentioned element you can make a reliable stop for the material being processed, thereby ensuring the straight movement of the cutter relative to base surface. The latter can act as a straight edge of a part, a guide rail or a table.

With this attachment for a hand router, you can quickly process edges and mill various grooves, holding the material almost in the “dead center” position.
Guide rail
This tool has similar functions to the previous one. Like the rip fence, the guide rail ensures extremely smooth, straight-line movement of the device. Working with a manual wood router using a guide rail can significantly reduce the time spent on processing a particular part. In addition, using the specified equipment, you can install the mechanism at almost any angle relative to the edge of the table.

In some cases, the design of the tools in question provides for the presence of special elements that facilitate the performance of certain operations (for example, this may be the function of cutting holes at the same distance opposite each other).
Copy rings and templates

Devices for a hand router, such as copying rings, are a round plate with a protruding shoulder that can slide along the surface along the template, thereby ensuring the exact trajectory of the cutter. Often this element is attached to the base of the workbench. There are several ways to install it:
- Screwing the ring into a threaded hole.
- Installation of special antennae of the device into the holes on the sole.
If you have such a device for a manual router as a template, you can also achieve more accurate and efficient work. The designated

the element directly on the workpiece itself, after which both parts of the device are pressed against the machine using clamps. Upon completion of the work, experts recommend checking the condition of the ring - see whether it is securely pressed against the edge of the template or not.
Another feature of the tool in question is the ability to process not the entire edge, but only its corners. At the same time, some devices for a hand router allow you to make curves of four different radii at once. Thus, the process of processing material according to a template is in a great way cutting grooves for the part.
Compasses
Data homemade devices for a manual milling machine, they are intended to move the entire machine along a certain circle. The design of this tool includes a main part (a compass consisting of one rod), attached at the end to the base of the router, and a secondary part - a screw with a pin inserted into the hole of the machine. The value is set directly by the offset of the machine relative to the device design. Before starting work, you must carefully secure the tool to the base and make sure that the router is in good condition and is functioning normally. It is worth noting that the most effective and easiest to use is the compass that has not one, but two rods.

Most often this instrument is made from transparent plexiglass. A small metric scale is additionally applied to its surface. It is worth noting that some models of compasses can have a circumference of up to 150 centimeters. Using this device you can easily make round table top for several people.
However, let's return to the principle of operation. Using an angular lever with a precise scale, copying is carried out on the workpiece. In this case, here you have the opportunity to center the ring directly under the cutter. The angle arm, which is complemented by a special support plate, also ensures precise edge milling.
The entire structure of this device consists of a base plate, a set of probes and a chip protection device.
Devices for copying identical devices and parts
This characteristic refers to a set of tools consisting of an angle lever and special copying probes, which are needed for the manufacture of a batch of identical parts. Most often, such equipment is used in cases where there is a need for replication. wooden devices small sizes. But before you start working with such a router, you need to prepare the angle lever scale in advance (division value is 1/10 mm).

Once the scale is set, you will be 100 percent sure of the correct centering of the thrust ring under the cutter, the location of which depends on the values set on the angle lever. Also, this adjusting element can be equipped with a support board and a special mechanism that protects the surface of the device from chips. The use of such parts will significantly speed up and secure the processing of product edges.
Many well-known companies are engaged in the production of wood processing equipment. Always enjoyed the greatest demand and popularity hand routers, with the help of which you can obtain exclusive and uniquely shaped products.
Anyone can work with a router, but when working you need to adhere to certain rules:
- The workpiece must be carefully secured to the workbench, which will improve the quality of processing and reduce the risk of injury.
- You need to move the tool so that the cutter blades move towards the wood, this direction is called counter. In the opposite direction, the tool will be pulled out of your hands, the processing line will be uneven and of poor quality.
- To mill various circles, ovals and ellipses, you can use special compasses that allow you to make a circle of a fairly large radius. There are several types of attachments that are quickly attached to the base of the router.
Using a hand router you can perform a whole range of jobs, from simple everyday tasks like inserting locks to complex decorative operations on expensive furniture, cutting out patterns, and wood carvings. Of course, a beginner should not start working with difficult task, it is better to start with something simple and gradually, as you gain experience, complicate the tasks.
Additional tools
When constantly working with a router, you will definitely need various additional tools and devices. First of all, this list includes:
- Electric drill with a set of drills.
- Various screws.
- Electric jigsaw with files of different lengths and thicknesses.
- Set of cutters.
- Set of files.
- Various templates.
- Protective clothing, respirator, goggles.
This is the minimum set that allows you to perform basic types of work with a router. As necessary, each master supplements it with his own tools, attachments, templates, which allows him to use the router at 100%.
Setting up the device + (Video)
 Before starting the tool, it is necessary to set its depth correctly. To do this you should:
- Install the tool on the part.
- Install the turret stop next to the end of the stop.
- Loosen the locking screw to move the router in the desired direction.
- Lower the engine to the surface to be treated.
- The depth limiter is set at the desired level.
- The locking screw is tightened.
- Depth adjustment is complete.
The choice of cutter rotation speed must be determined based on the density of the surface being processed and the diameter of the cutter itself. Usually for processing wooden products a speed of about 10,000 rpm is used, which allows you to get an even and smooth cut. Very high speed rotation of the cutter can cause charring of the surface being processed and lead to breakage of the part.
Very hard surfaces are processed with cutters at low speeds, and from time to time it is necessary to run the engine without load at maximum speed, which will allow it to cool.
The choice of the linear speed of movement of the cutter is based on its diameter; the larger it is, the lower the applied speed, which is set by the regulator. When installing a cutter, you must follow the instructions of its manufacturer, which will necessarily indicate the rotation speed and recommended linear speed.
Cutter selection
 For each type of work performed by a milling cutter, it is necessary to choose the right cutter. This will not only allow you to process the material efficiently, but also complete all the work much faster. You can purchase entire sets of different cutters that allow you to perform a wide range of operations.
Structurally, any cutter consists of a shank that is clamped in the tool chuck and a special cutting part. Milling cutters differ from each other both in size and material, and in the shape of the cutting part. During processing soft rocks For wood, cutters made of ordinary metal are used; for hardwoods, stronger cutters with soldering are chosen. There are several types of cutters:
- Used for processing various types grooves - rectangular.
- For decorating all kinds of products - profile ones.
- For processing wood at different angles - cone-shaped.
- For making inscriptions on the surface being processed - v-shaped.
- To make grooves in the horizontal plane - disk ones.
- To make quarters in wood - rebated ones.
- To round the working edge - molding.
- To make fillets - fillets.
- For making any tenon joints - dovetail type.
The procedure for installing the cutter + (Video)
Installing a cutter on a tool is not difficult and involves following simple steps:
- The selected cutter is inserted into the chuck with a shank to a depth of about 20mm.
- The cartridge snaps into place and is tightened with a nut.
After fixing the cutter, set the router to the required depth using a movable stop. Then they perform a test cut to ensure that the settings are correct and then begin work.
Safety regulations
 Techniques safe work with the device must be prescribed in the manufacturer's instructions; do not neglect them to avoid injury. The basic rules for safe work include:
- Be sure to wear protective clothing and no hanging parts that could get wrapped around the router.
- Protect your eyes from chips by wearing safety glasses or a mask.
- Protect your respiratory system with a respirator.
- Be sure to unplug the device from the outlet when not in use.
- Hold the tool firmly in your hands to prevent it from slipping when touching the workpiece.
- Be sure to study and follow all requirements of the manufacturer's instructions.
Fulfilling these simple requirements will allow you to avoid injuries when working with a router, because this is a rather dangerous device. Learning to work with wood requires not only strong desire, but also special patience and attentiveness. Only a combination of all these qualities will allow you to gain experience and achieve high peaks skill.


