Over time, under the roof of anyone car garage a whole arsenal of various household supplies and household items accumulates, for which there is no place either in the home or in the pantry.
To prevent the formation of a chaotic dump, the space inside the garage must be properly organized. And this can be done using a homemade shelf and rack system. It will allow you to neatly and rationally place things stored in the garage and thereby create the most comfortable conditions not only for car care, but also for solving everyday household problems.
Principles and possibilities of arranging a car garage
The main purpose of a garage is to store a car. This means that first of all, the car owner must eliminate possible attacks on the property stored inside, that is, ensure the safety of the latter. An equally important issue is the correct climate regime in the garage space - the condition of the car should in no case depend on the vagaries of the weather or the appetites of harmful microorganisms such as fungus or mold. Another principle of organizing the situation in the garage - ergonomics - says that everything under the roof of the structure should always stand, lie or hang in its place, without interfering with the passage, travel, cleaning or car care process. With all this, it is imperative that the premises be clean and tidy, which are the key not only to the health of the car owner, but also to his safety when visiting the garage and performing all kinds of business or repair operations.
In accordance with these principles, at the first stage of arranging a garage you will need:
- Install a reliable locking system on gates and windows, if any.
- Insulate the structure of the structure or organize high-quality heating of the interior during the cold season.
- Execute interior decoration reliable, durable and easy to clean materials.
After finishing finishing works You can begin the final stage of arrangement - organizing the interior of the garage. To do this, you need to draw up a detailed plan of the premises and determine what and how exactly will be stored in it, in addition to the car.
Garage plan for a car with estimated dimensions
As a rule, the wall farthest from the entrance to the garage is allocated for racks and shelves. If the dimensions of the room allow, it is advantageous to equip the side walls with shelves. If there is a lack of free space in the garage, special attention should be paid to the space under the ceiling, as well as above the car itself. Shelves equipped on the upper level will allow you to relieve the lower part of the room by storing things that need to be used from time to time.

Wooden shelves on a metal frame under the garage ceiling
The configuration and dimensions of the racking system depend on the size of the garage and the needs of its owner. The materials from which the shelves will be made must be strong enough to support the weight of the items being stored. For example, tiers can be made of thick plywood or boards, and the frame can be made of metal pipes or corners, but other options are possible.

Wooden shelving system for a garage
The method of assembling and installing the racking system depends on the material used to decorate the garage, as well as design features the building itself.

In many cases, shelves are hung on the walls, and racks are installed directly on the floor. However, shelves can also be hung from the ceiling, while to increase the stability of a separate rack, its frame is often equipped with fastenings for walls, floors and ceilings.
Open Hanging Garage Shelving System
- When calculating the parameters of a racking system, several points should be taken into account:
- The distance from the bottom shelf to the floor is taken to be at least 20 cm. This significantly simplifies the process of cleaning in the garage.
- The width and height of the shelves must correspond to the dimensions of the items being stored.
It is advisable to perforate the shelves in order to improve ventilation, as well as to avoid the accumulation of dust and dirt.
Self-production of shelves and racks for the garage You should thoroughly prepare for the arrangement of the garage space.
- For this you will need:
- perform structural calculations;
- select and prepare materials;
When planning a shelving system, first of all you need to make at least an approximate list of items stored in the garage, not forgetting to estimate their weight and dimensions. You should also draw a plan of the garage, on which you need to indicate on a scale accurate to the centimeter design parameters designs (height, width, thickness, pitch and number of shelves). Afterwards, it remains to carefully consider the method of assembling and installing and fixing the shelves or a separate rack.
Please note: The choice of the type of shelf and rack system and the method of its installation and fastening largely depends on the properties of the materials from which the garage is made. So, if the walls of the latter are metal, you will have to tinker quite a bit with hanging shelves, while the simplest attached shelving will save the garage owner from complex manipulations with fasteners, garage insulation etc. The most convenient option is plastered brick walls. In such a garage, you can give free rein to your imagination and install a combined shelving system with many useful functions for your household.
Material Selection: Key Points
Materials for creating a shelving system for a garage are selected based on considerations of ease of assembly, as well as reliability and practicality in operation.
So, for shelves intended for storing heavy and large items, you will need a reinforced frame, for the creation of which a metal corner or a profiled pipe is best suited.
But in this case, the garage owner cannot do without the skills of cutting, drilling and welding metal. In addition, the latter needs protection from corrosion, and this is associated with additional financial costs. You can also use it as a frame for garage shelves or racks. wooden blocks
40–50 cm thick. Working with wood is much easier than working with metal, but you still have to take care of protecting the material from mold, rot, moisture and other aggressive operating factors.
- As for the material for making the shelves themselves, the most practical solutions include:
boards with a thickness of 2 cm;
- Edged board is one of the cheapest and easiest to use materials. Garage shelves made from planks will last for many years. But to increase ease of use and increase their service life, they must be sanded and covered with an antiseptic and paint, which will protect the material from mechanical damage, pests and rotting.
Plywood is a practical and inexpensive material with high strength and durability measured over decades. Working with this material is not difficult, however, when making shelves it should be sanded with fine sandpaper and coated protective layer paint or varnish. This will prevent the plywood from getting wet, drying out and cracking under the influence of dampness, temperature changes and aggressive chemicals.
- particle boards.
Chipboard is a cheap and easy-to-use material, but difficult to use. When making shelves from chipboard using varnishing or painting, it is necessary to protect not only the working (upper) and lower planes, but also the ends, as well as holes for bolts and perforations, from damage and aggressive influences. At the same time, the latter require increased care when performing due to the structure of the material.
Please note: A quick but rather expensive option for arranging a garage is to purchase ready-made plastic or metal perforated shelves with factory fastenings or a prefabricated shelving frame. In the absence of sufficient funds, the most reasonable solution would be to independently manufacture the structure from materials prepared at the discretion of the garage owner.
Design calculation
First of all, it is necessary to determine the location of the racking system. If we are talking about several small shelves, you can make a sketch directly on the wall, while drawing a frame shelving will have to be done on paper.

Sketch of hanging shelves on the garage wall
When planning the structure you should consider:
- dimensions and weight of items placed on shelves;
- the necessary amount of free space for passage;
- the dimensions of the spaces between sections and the vertical spacing of the shelves;
- methods for attaching shelves to the walls or ceiling of the garage;
- the need to attach the racking system to the floor or ceiling.

Calculation of an attached shelving system for a garage
If a rack is installed in the garage, it is advisable to select its height according to the height of the room. As for wall or hanging shelves, it is convenient to calculate them from top to bottom. If the dimensions and layout of the garage allow, the width of the shelving tier is selected along the entire length of the wall with a margin of 5–10 cm for ease of installation. The optimal depth of the rack is 50–60 cm, although for large items ( car tires and disks, spare parts, boxes, etc.) it would be reasonable to provide wider shelves.

Closed Hanging Rack for Garage
The height of the tier can be different and is selected according to the needs of the garage owner. It is practical to place the widest and deepest shelves at the bottom. It is more convenient to store heavy and bulky items here, which are easy to reach if necessary. On the other hand, deep shelves can also be installed under the garage ceiling. After all, on the upper tier it is very convenient to store large but light items or rarely used items. In addition, it is convenient to divide individual tiers into sections, which will facilitate sorting of stored goods.

Drawing of a simple shelving system for a garage
Please note: It is not advisable that the width of the shelves, especially from thin material, exceeded 1–1.5 m. This will lead to a decrease in the strength of the structure and sagging of the tiers. As for the length, it is convenient to start from a size of at least 60–80 cm, otherwise the shelves will be inconvenient for storing long items. The vertical pitch of the racking system is taken according to the required storage height. For example, the height of the lower tier can be taken as 70 cm and used for storing car tires, rims, large containers, etc. If you add another 2 tiers of 50 cm each, the total height of the rack will be 1.7 m. In a garage with a ceiling height of 2.5 m, the topmost shelf of this design will have a 60 cm pitch, taking into account the 20 cm distance from the floor to the lower tier .
Tools and auxiliary materials
To independently manufacture, assemble and install a racking system, you will need a considerable arsenal of tools, as well as auxiliary materials. The tools for completing the task contain:
- building level;
- tape measure and marker;
- screwdriver;
- electric drill with hammer drill function;
- jigsaw;
- circular saw with metal blades (if the frame of the rack is made of steel angle or profile pipe);
- welding machine (for welding elements metal frame rack);
- hand tools (construction angle, pliers, hammer, screwdrivers and wrenches).
Please note: A welded rack frame is difficult to manufacture, so bolted connections are often preferred to welding.
The list of auxiliary materials should include:
- dowels or anchors (for attaching a wooden or metal frame to garage structural elements);
- self-tapping screws for wood or metal or bolts with nuts (for attaching shelves to the frame);
- drills for concrete, wood and metal;
- primer and paint for metal and wooden elements designs;
- priming brush;
- sanding paper.
Please note: In some cases, it is more convenient to fix wooden shelves to the frame using special glue.
Making your own shelving system
Self-construction of shelves or racks for a garage is carried out with subsequent assembly. The operating algorithm is as follows:
- By using circular saw or a jigsaw, frame elements are cut from a steel angle, profiled pipe or wooden block: racks, transverse and longitudinal crossbars, amplifiers.
- Markings are made on the vertical posts of the rack to install transverse and longitudinal crossbars under the shelves.
- If we are talking about shelves, on the horizontal crossbars that will hold them on the wall, the attachment points are marked with dowels or anchors. Next, they need to be transferred to the wall and holes of the appropriate diameter and depth must be made with a hammer drill.
- On the frame elements for bolted connections, holes of the required diameter are made using a drill with a metal drill.
- If the choice fell on a welded frame, the elements of the latter must be joined with neat seams.
- The metal frame is sanded, primed and painted. It is also advisable to sand, prime and paint the wooden base of the shelving system to protect it from mold and rot.
- Shelves of the required size are cut out of chipboard, plywood or boards, after which their surface must be perforated.
- The shelf frame is attached to the wall or ceiling of the garage, after which the shelves are fixed to it using glue, screws or bolts.
- Assembling a separate rack is carried out in several steps:
- installation of side racks;
- fastening of transverse and longitudinal crossbars, as well as amplifiers;
- installation of shelves on the frame.

Homemade shelving system with a metal frame and chipboard shelves
How to make shelves yourself
If there is not enough free space in the garage to install a separate rack, the room is equipped with shelves. The latter may be:
- hanging;
- mounted.
It is rational to install hanging shelves in rooms whose walls are made of materials that are difficult to process or are unable to bear additional loads. In this case, the shelf frame, which is usually made of metal, will be attached to the ceiling. The latter must be strong enough to withstand the weight of not only the entire structure, but also the items stored on the shelves.
Please note: To reduce the load on the ceiling, it is advisable to equip the frame of the structure with wall fastenings.
The production and installation of hanging shelves is carried out in several stages:
- After taking measurements, three elements should be cut from a metal corner or profile pipe: the main longitudinal beam, vertical posts and horizontal crossbars.
- Holes are made on the main longitudinal beam for fastening to the ceiling or side walls of the garage.
- Horizontal crossbars are welded to the vertical posts or secured with bolted joints.
- Using welding or bolting, the frame is attached to the main supporting beam fixed under the ceiling.
- Horizontal crossbars that rest against the wall are equipped with fasteners (corners) for reliable fixation.
- Shelves are cut out of boards, plywood or chipboard according to pre-calculated dimensions. Before installation, they must be perforated and equipped with holes for fastening to the frame.
- Using bolts, the shelves are mounted on the frame.

Hanging shelf system with a load-bearing beam fixed to the garage walls
Please note: If the garage ceiling is made of concrete or other material of sufficient strength, the load-bearing beam can be dispensed with. But in this case, you will have to attach each of the vertical frame posts to the ceiling plane.

Installation of a shelf frame on a concrete ceiling
Wall shelves are made in the following way:
- After taking measurements, horizontal load-bearing beams for each shelf, vertical posts and horizontal crossbars are cut out of a metal corner, profile pipe or wooden beam.
- Horizontal crossbars are equipped with mounting holes and fixed to the supporting beams.
- The beams are mounted on the wall using anchors or dowels.
- Shelves cut from boards, plywood or chipboard and pre-sanded and painted are fixed to the installed frame using bolts or self-tapping screws.

Wooden wall shelves made of wood mounted on a brick wall
Please note: To mount the shelf frame on the wall or ceiling of the garage, it is convenient to use special brackets that are sold in the store. Wooden base the rack is additionally reinforced at the nodes with the help of metal corners or spacers.
Video: self-production of a racking system
Additional amenities in the garage
If the garage is spacious enough, it can be used not only as a warehouse for spare parts, tools, building materials and all kinds of household rubbish, but also as a home workshop. To do this, you need to add devices to the environment that greatly increase the convenience of performing various technical operations. Such devices include:
- Workbench;

Homemade workbench for working in the garage
A workbench is a very useful piece of furniture in a garage, which is a table equipped with drawers, shelves, bedside tables and technical devices for performing various household or repair work(vice, electrical outlet, local illumination, etc.).
- washing;

Washing and hob in a car garage
Washing - practical and useful solution, which will ensure uninterrupted water supply in the garage, necessary not only for washing hands, but also for car care, as well as activities related to indoor cleaning.
- inspection hole;

DIY garage inspection pit
An inspection pit is an extremely necessary device for a garage in which the car will not only be stored, but also repaired.
- vegetable storage (cellar);

Cellar (vegetable storage) in the garage
If there is not enough free space in the house, the garage can be equipped with a vegetable storage facility, in which it is convenient to store vegetables, pickles or foods that require special temperature conditions.
- closet;

Wardrobe built into shelving system in garage
A cabinet built into the shelving system in the garage will not only allow you to neatly place various small items, tools or spare parts, but also limit access to them.
- ventilation, heating, etc.
Ventilation and heating in the garage are necessary if the room is used all year round, and not only for storing cars, but also for performing repair and household work.
Please note: the arrangement of a garage space entirely depends on the needs and financial capabilities of its owner. At the same time, almost any of necessary equipment for car care or maintenance household You can either buy it ready-made, or make and install it yourself, significantly reducing cash costs.
Solutions Gallery
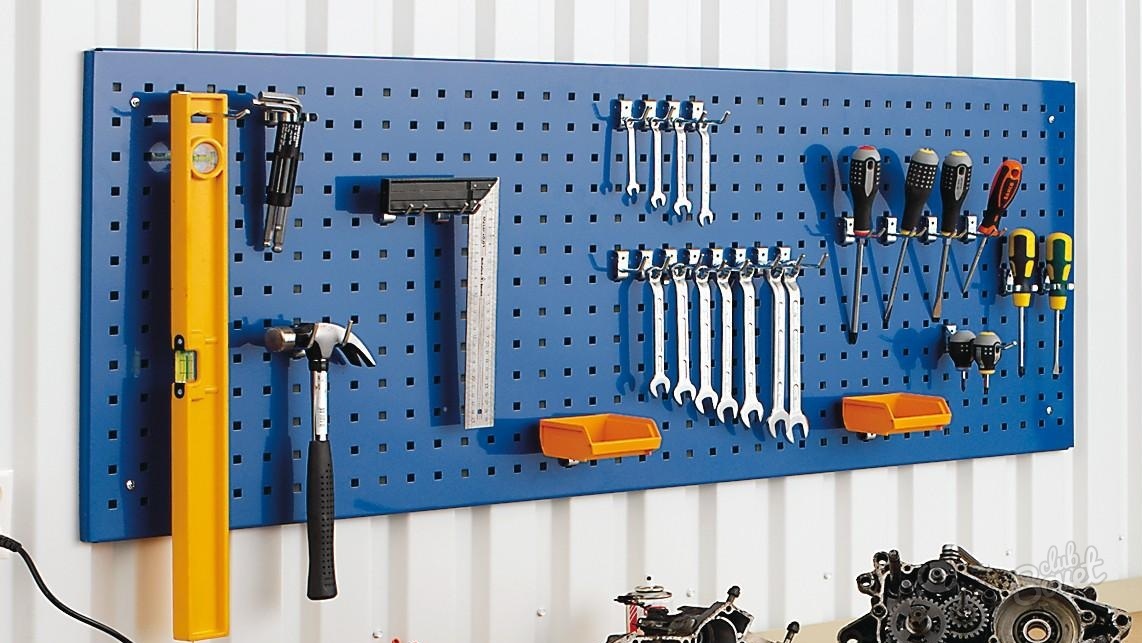
 A universal wall for storing tools, auto parts and household equipment in the garage. A wooden shelving system for arranging a garage space.
  Storing power tools in the garage on a special shelf
Many useful ideas are born directly in the process of arranging a garage. For example, the racking system can be made collapsible, some of the tiers can be equipped with sides or sections for storing various small items. It is noteworthy that it is very difficult to immediately plan everything that may be needed in the process of car care and solving household problems in the garage. Therefore, it’s worth starting with the most necessary things, for example, with shelves or a rack, a workbench or a cabinet, which will optimize the space in the room and make it easier to carry out everyday work on car and household care.
Reading time ≈ 12 minutes
Original shelves DIY garage projects are presented today with many options and examples with photos. They can become a decoration for the room, as well as a reliable place to store automotive equipment, parts and tools. You can make racks yourself by developing your own design, taking into account the required dimensions and functionality.
Frame shelves for tires and tools
Functional garage storage system
Not only is it customary to store and maintain a car, but you can also find a lot of places to install shelves and racks. Therefore, today there are many options for different designs, differing in material, shape, configuration, size and design.
They should be:
- Durable;
- Reliable;
- Compact;
- Not bulky;
- Durable;
- Functional.
Installing hanging shelves, built-in drawers and modular structures will help bring order to the garage and free up space from an impressive amount of accumulated junk mixed with tools.

Neat arrangement of things in the garage
Why do you need a shelf and rack system in a garage:

Self-made shelves are excellent option creating any design from photos, diagrams and drawings. The main thing is that the room itself is clean, spacious, well equipped and free of unnecessary rubbish. How best to organize this space:

Where can you install shelf storage systems:
- On the wall farthest from the entrance;
- If the room is large, you can also use the side walls;
- In the ceiling space and directly above the machine position.
Every motorist must remember that all storage installations should occupy no more than 20% of the total space inside the garage.

Optimal organization of the storage system - 1. Open brackets and hooks, 2. Rack for tools, 3. Shelves for spare parts and wheels, 4. Rack for large tools, 5. Cabinets, 6. Workbench
Types of structures
The garage can store everything from car accessories to carpentry tools and other small items. All items that do not have enough space in the pantry and on the mezzanine should be neatly folded or placed on wall shelves or stationary racks.
Based on the type of assembly, structures can be of the following types:

Special attention should be paid to shelves intended for car spare parts, namely rubber tires and wheels. This design is:

Experts advise storing tires near the ceiling space on the upper tiers so as not to clutter the garage. To free up useful space, you can mount a rack with several shelves at once. Some people hang the wheels on the wall itself, hooking them onto a screwed-in lock.

Folding corner shelves for seasonal tire storage
According to the material they are distinguished:

When developing storage systems, you should take into account the dimensions of the garage space, the purpose and functionality of all installed shelves.
According to the method of fastening the structure, there are:

How to make original stable shelves for the garage with your own hands is shown in the video from step by step instructions from the master.
If you are planning to make garage shelves and racks yourself, have chosen the material and location, it’s time to make markings taking into account all sizes.
The assembly stages of any structure are as follows:

Why is it better to assemble the structure yourself rather than purchase a ready-made kit on the construction market:

When creating products with your own hands, you can develop a unique design and make a structure according to individual parameters. If you follow all the rules and strictly follow the instructions of the craftsmen, the shelves and racks will turn out attractive and practical. The assembly process is shown in detail in the video below.
DIY tool shelf
This product will undoubtedly be useful around the house, as well as for plumbing and repair work in the garage. A special shield will serve as a place to store and secure essential items and small tools. The installation height is selected according to the height of the owner to increase comfort of use.

What you will need to assemble it yourself:
- Plywood board or chipboard up to 2 centimeters thick;
- Shelf material;
- Anchors to secure the entire structure;
- Brackets to fix the product on the wall;
- Electric jigsaw;
- Drill;
- Building level;
- Tape measure for measurements;
- A hammer drill with a nozzle and drills for making holes;
- Hooks for attaching tools and parts;
- Set of self-tapping screws.

Option for making a shelf-shield
Manufacturing stages:

The last step is to make holes with a hammer drill into which all the anchors need to be driven. If the installation of the shelf on the wall is successful, it’s time to arrange and hang all the parts as planned.

Garage wheel rack
Tires with this design can be stored on their edges. In this case, the shelf itself must be fixed upside down so that the fastenings on the side hold the wheels.
- Using an anchor, triangular-shaped fasteners are fixed;
- The evenness of the line can be checked with a level, and the distance between the side fastenings can be measured with a ruler (it should be 50 or 100 centimeters);
- To prevent the shelf from falling under the weight of the tires, you should choose sufficiently thick and long dies. The structure is fixed from above, after which the surface can be painted in any color (in our case, white) and the product can be allowed to dry thoroughly.
Such a holder can accommodate from two to four wheels, it all depends on the selected parameters and individual preferences.

Homemade shelf for seasonal storage of tires or tools
Additional accessories
In addition to storage systems for tools, a home workshop and car parts, the garage can contain additional amenities. Among them are:

Garage shelves made of practical wood or durable metal, made with your own hands according to drawings and diagrams with photo examples, will become a real decoration of the room. After all, sometimes from a couple of oak boards and available materials you can create a real masterpiece that will amaze the imagination. The construction of a durable rack is shown in the video master class with step-by-step instructions.
Of course, a garage can be equipped ready-made systems storage, which are in large assortment available in stores. But do-it-yourself racks and shelves have many advantages over them.
- Saving money. In any case, a homemade product will cost less than a purchased analogue. And if the household has some materials left over from renovations in the apartment or landscaping, then the benefits will be even more tangible.

- Optimal sizes. Among the ready-made structures, it is difficult to find one that will fit comfortably in the garage without taking up extra space, and at the same time accommodate everything that needs storage. When making your own, you can take into account both the dimensions of the room and required amount and shelf size.

Garage shelving can be made to any size
- Reliability. Affordable racks and shelves are often not very strong; they may not support the weight of the stored equipment. Or they will not last long in difficult operating conditions. For homemade designs The garage owner himself chooses materials, the strength, quality and load-bearing capacity of which he has no doubt about.

- Design. Not the most important item on this list, but significant for some. Especially if the car owner uses the garage for other purposes. For example, as a workshop in which everything should be in its place.

Shelf designs for garage
Depending on the installation location, the shelves can be:
- wall-mounted, suspended from the wall using anchors or other suitable fasteners. These can be ordinary boards laid on corner wall brackets, or multi-tiered structures made of angle steel, profile pipe or wood;

Wall structure - brackets and boards attached to them


Wooden racks fixed to the wall
- floor-mounted in the form of shelving supported on the floor in a variety of designs;


- suspended, which load-bearing frame attached to ceilings or ceiling beams on anchor bolts or on anchors with hooks or rings. The frame in this case can only be metal - from long pins, cable or perforated profile. Their advantage is that they can be placed anywhere without being tied to walls. If there are metal beams and lintels on the ceiling, it is possible to manufacture a welded shelf.


Note. Hanging shelves without additional fastening they can swing against the wall, so you shouldn’t store expensive or fall-sensitive instruments on them.
TO wall shelves This also includes special shields equipped with hooks, holders, hangers and other devices for storing hand tools. Small shelves for containers with fasteners and small parts can also be attached to them.

Such shields are hung on the wall using eyelets or attached to it through a through method.
According to the assembly method, shelves can be stationary, collapsible and mobile.

The choice of design depends on free space in the garage allocated for the storage system. And also on the material of the walls and ceiling and their decoration, the height of the room and other factors that are individual in each case.
Prices for collapsible racks
Collapsible racks
Materials for production
To equip your garage with shelves for storing things, it is best to use metal or wood. Other materials are not suitable for use in conditions of frequent temperature changes, air humidity and a high probability of mechanical damage. For example, chipboard quickly absorbs moisture and swells, while plastic does not have sufficient resistance to stress.
The most reliable material is metal in the form of steel angles, round and profile pipes. It is strong, durable, easy to withstand heavy weight stored items do not burn. To give it an aesthetic appearance and resistance to corrosion, all structural elements are coated with special protective or paint compounds.

But to make metal shelves you need certain skills and equipment to work with it. In addition, this material cannot be called cheap.
In contrast, wood is more accessible both in terms of cost and in terms of processing of parts, availability necessary tools. It is not as durable and strong, but it is unlikely that extreme load resistance is required in the garage. And the wear resistance of wooden elements is also increased by the use of protective coatings.

The main disadvantage of wood is its flammability, but wooden structures can be protected from accidental fire with the help of fire retardant impregnations.

Prices for various types of Dali universal antiseptic
Universal antiseptic Dali
Most best option for garage shelves and racks - this is a combination of materials: the frame is made of metal, and the actual shelves or floorings are made of wood. This allows you to reduce costs and ensure acceptable reliability and durability of the structure.
When planning storage shelves, you need to calculate everything and make sure that they will withstand the expected weight of the items, they will fit comfortably on them, and the design itself will not interfere with either the car or its owner.
It is best to make a preliminary drawing or just a sketch, transferring all the measurements onto paper and thinking through the methods of connection and fastening. When creating a project, we suggest taking into account the following recommendations:
- The thickness of the shelves depends on the material and the expected load. As a rule, for storing tools, wheels and other heavy objects, wooden shelves are made at least 30 mm thick;

- The distance between the supports is also of great importance. The greater the weight and the smaller the thickness of the flooring, the smaller this distance should be. The optimal shelf length in terms of reliability and convenience is considered to be from 80 to 120 cm for wooden structures and 150-200 cm for metal ones;

- their depth should not exceed 60 cm, otherwise it will be inconvenient to get something from the shelf. But this parameter is selected taking into account the purpose and depends on what exactly is supposed to be stored on this tier. If shelves from floor to ceiling of different depths are needed, then it should decrease from bottom to top;

- This rule also applies when choosing the distance between shelves: the highest should be the lowest. Large and heavy items are stored on them, while small and light items can be placed higher.

In general, first of all, you should proceed from your own needs, the number and type of items for storing which the system is created. At the same time, they try to make good use of every centimeter.
Manufacturing examples
Those who are interested in the possibility of independently equipping a garage may find detailed descriptions of the manufacture and fastening of shelves useful. Several options are given below.
Suspended ceiling shelf
The simplest shelf can be made from a sheet of plywood and four long threaded rods. And fix it to the ceiling using anchor bolts and couplings.
Cut from plywood or furniture board shelf of the required size. It is advisable not longer than 70-80 cm, otherwise it will bend over time. To strengthen it, you can add a couple of studs or edge the shelf at the ends with a metal profile.

In the corners, stepping back from the ends by 4-5 cm, we drill holes in the shelf with a diameter slightly larger than the thickness of the pin. We apply it to the ceiling and put marks on it through the holes made.

Using a hammer drill, we drill a hole in the ceiling according to the marks. The diameter of the drill must match the size of the anchor bolt. We hammer the anchors into the holes.
Prices for popular hammer drill models
Hammers
We connect the stud to the anchor using a long hex turnbuckle.
Screw a nut onto each stud and put on a wide washer. Then we thread the ends of the studs into the holes in the shelf and adjust its height with the second pair of nuts and washers installed from below.

The ends of the studs that are too long can be cut off or used for a second shelf.
Wall mounted wooden shelf
You can make several parallel shelves along the entire length of the garage wall only from wood - boards and bars, fastened with self-tapping screws.
We cut out several supports from the board in the shape of a truncated right triangle.

Its length is calculated depending on the number of shelves and the distance between them. If the width of one board is not enough, then we join a rectangular segment with a triangular one.
On both sides we screw 20x40 mm bars to each bracket. One along the top cut, the rest parallel to the first with an indent equal to the distance between the shelves. They will rest on these bars.


We make markings on the wall using a level and a tape measure, marking the position of the manufactured wooden brackets. The distance between them is selected taking into account the length of the boards, but it should ensure the reliability of the structure and not be too large.

We screw the hangers to the back of the brackets with self-tapping screws. These can be steel strips with drilled holes for wall mounting.

We try on the brackets to the wall according to the markings and put marks on it through the holes in the hangers.
Drill holes in the wall according to the marks.

If the load on the shelf is small, it can be secured with dowel nails. But it is better to use expansion anchors.

Instead of the outer corner brackets, we attach support bars to the transverse walls at the same level at which they are screwed to the brackets.

Fixation of bars - supports
Step 9We lay the top shelf of boards cut to size directly onto the brackets and screw it in place. We insert intermediate shelves between them supported by bars. And we screw the bottom one to the lower ends of the brackets.


Wooden floor rack
And another completely wooden structure, but more spacious. To make it, you will need about thirty boards for the flooring and 50x50 mm timber for the posts and lintels. First you need to make a drawing and decide on the amount of material, the height of the racks, the depth of the shelves and other parameters.
Advice. You can take the above drawing of the rack as a basis and, if necessary, add the required number of sections.
| Step by step photos | Description |
|---|---|
| We cut the beams and boards to length according to the drawing and plan them so that the details were smooth, without burrs. |
| We mark places on the racks fastening the crossbars for shelves and select grooves 1-1.5 cm deep. |
| On the opposite side of the groove, drill two posts shallow holes big drill. Hats will be recessed in them self-tapping screws |
| We insert jumpers into the grooves. For reliability, they can be coated with wood glue. |
| We twist the racks with crossbars through the previously drilled holes. |
| Two or more such supports need to be made, depending depending on the number of rack sections. They have to turn out absolutely identical, with the crossbars at the same level. |
| We install the supports in place. The far racks can be attached to the wall with metal corners. |
| We lay boards on the crossbars and fasten them with self-tapping screws. |


Video - Making shelves in the garage with your own hands
Metal welded shelves
This option is suitable for those who know how to work with a welding machine. This example uses quite non-standard way stationary fastening of the metal frame to the walls. It is quite reliable and allows you to save on the purchase of anchors, which would require a lot. Instead, short sections of steel reinforcement were used. And the frame itself is assembled from a 20x40 mm profile pipe.
We make horizontal markings on the walls for each row of shelves.

We cut the reinforcement with a diameter of 12 mm into pieces about 10 cm long.

We drill holes in the walls with a depth of 7-8 cm according to the markings, using a drill corresponding to the diameter of the reinforcement. The step between them is 1 meter; you need to step back from the markings down by the thickness of the profile pipe.

In order for the structure to hold firmly, the direction of drilling adjacent holes must be changed, directing the drill either perpendicular to the wall or at a slight angle.
We hammer the pieces of reinforcement into the holes so that the corrugated pipe can be placed on the part protruding from the wall.

We cut the pipe with a grinder into pieces corresponding to the size of the shelves. And we weld them to the reinforcing bars sticking out of the wall.

Having secured the rear and side frame elements, we weld the front ones to them.

From the same pipe we cut racks from the floor to the top shelf, install them every 120-150 cm and weld them to each horizontal row, having previously leveled it.

To ensure the rigidity of the entire structure, we additionally weld jumpers from each rack to the far wall of the frame.

All that remains is to sand the welding points, frame and lay boards or plywood on it.
Prices for popular models of welding machines
Welders
Shelves for tools
These shelves are easy to make. It is enough to drill holes of different diameters in a board or piece of plywood for screwdrivers, hammers, wire cutters and other tools available for work. And secure it horizontally.
Vertical installed shields can be equipped with different holders using ingenuity and imagination. It can be:
- screws screwed in at a certain distance from each other;

- magnetic strips;

- hooks and ;

- bars with grooves and even grooves cut with a milling cutter according to the shape of each tool;

- cuttings of pipes or plastic bottles.

If desired, anyone can equip their garage with a convenient storage system with maximum use of free space. Only need suitable material, appropriate and some free time.
Video - The simplest wooden shelves
A garage is a place not only to store a car, but also various instruments that are required for its maintenance. Besides all this, it may also contain other things. Without proper systematization, it may happen that you have to look for something for a very long time. To make your task easier, you can build shelves in the garage to store various utensils. What are the ways to implement shelves? This will be discussed in the article.
Types of shelves
There are really no restrictions on what to choose from when it comes to shelf designs. They can be classified by:
- material of manufacture;
- mobility;
- sizes;
- location.
As a material for making garage shelves, you can choose from:
- wood;
- plastic;
- metal;
- wood derivatives.

The most affordable material for shelves is wood. You can use everything that has not been used before. One of the disadvantages of wood is its fire hazard, so before making shelves it will need to be treated with fire retardants. Most often, garages are unheated, which means that they may contain condensation that appears due to temperature changes. This is also a bad indicator for wood, which leads to the development of putrefactive processes and complete destruction of the material. For work, it is better to choose moisture-resistant boards, for example, OSB. In this case, you can be sure of a long service life.

Plastic perfectly withstands the effects of various factors and substances, so it is perfect for use in the garage. In this case, it is worth choosing the right plastic thickness for the shelves. Due to heavy load, such shelves can simply burst. One of best solutions The material used for shelves in the garage is metal. When properly processed, it has a long service life. In addition, it can be used to construct shelf structures various shapes. Also, metal can withstand a lot of weight, so it’s easy to place all the tools on such shelves.

Garage shelves can be stationary, mobile, modular or collapsible. Everything is clear with stationary ones. The shelves are attached to one of the planes and are used only in this place on a permanent basis. Some types of shelves can be mobile. They are a small structure equipped with wheels. The convenience of this design is difficult to overestimate. You can always have the basic tool at hand, no matter where you are in the garage. Modular shelf designs are interesting solution, which consists of separate blocks. They are easy to combine or use separately depending on your needs. It's also a good idea to have collapsible shelves in your garage. They are used for temporary storage of any items, and when not needed, they are folded and set aside.

Depending on the location of the product there may be:
- wall-mounted;
- floor;
- ceiling
Each of these types of shelves is convenient to use in its own way and has its own characteristics of attachment to the surface. It's easy to fit multiple shelving options into your garage.
Design

Before you begin installing shelves in your garage, you need to think carefully about their size and choose their shape. The first step is to inspect the garage and determine whether it is possible to completely free one of the walls. If this is the case, then its plane can be completely reserved for shelves. This will save space and place all the necessary things. The length of the shelf will depend on the size of the wall, the same applies to the height. In terms of depth, you need to think about how the structure does not protrude too much. Also, the far corner of the shelf should be easy to reach without additional equipment.

Typically, the width of the shelves is taken to be equal to the size of an outstretched arm. Therefore, it is necessary to select individually. The average size is 50 or 60 cm. On the wall, the shelf structures are located at different heights from each other. It all depends on the dimensions of the stored objects. Separately, you can select a shelf on which winter or summer tires will be located. The width and height of the other shelf should be sufficient to accommodate canisters of fuel and oil. If the shelf must support a lot of weight, then, in addition to attaching it to the wall, you can provide supports that will go to the floor. The number of such supports depends on the expected load. In most cases, it is enough to place them every meter.

When arranging shelves on top of each other, it is important to think about ease of access. The upper shelves should not interfere with placing things on the lower ones. Also, the upper structure should not be traumatic, so that in insufficient lighting you do not hit your head on it. After analyzing all the points, you can transfer the drawing to a piece of paper indicating the specific location and size of the shelf.
Manufacturing
Making shelves with your own hands requires having skills in working with power tools, which will be required for a specific type of material.
Wall mounted

Wall shelves are the most common because they are the easiest to build and are quite practical. It is better if the wall shelf structures are combined. This implies the presence of a frame made of metal, and the shelf itself made of wood. To work you will need:
- metal corner 3×3 cm;
- OSB boards;
- perforator;
- welding machine;
- Bulgarian;
- drill;
- marking tool;
- roulette.

For greater strength of the shelves, you can use a metal corner with a size of 5x5 cm. According to the prepared drawings, the corner is marked into blanks. Some are longitudinal, others are transverse elements. It will be easier to connect together blanks for shelves that will have an end at 45°. First of all, using welding machine The rectangular base of the shelf is assembled. The next step is the manufacture of the fastening system. It consists of two vertical sections of a corner, which are welded to the base and connected by a jib to the front part for greater rigidity.

The result should be a shelf design that resembles a right triangle from the side. After welding, it is necessary to clean the seams. To do this you will need a grinder and a special grinding disc. Next, the entire metal surface is cleaned, the shelf is primed and painted. In the vertical racks of the shelves that will be attached to the wall, two holes are drilled. Next, the shelf is applied to the wall and the hole marks are transferred to the plane. In this case, the structure must be leveled using a level. You cannot do without an assistant in this situation.

Holes are drilled in the wall using a hammer drill, and the shelf is fixed with expansion anchors. Once the product is fixed in place, you can begin cutting out the wood inserts. In size they should be a few millimeters smaller on each side. This will make it possible to calmly lay a piece of slab on a base of corners.
Ceiling

Ceiling shelves are also very functional. Most often, this space does not carry a payload, so it can be used for shelves. They can be implemented in several ways, of which the two most accessible are:
- using containers;
- using hairpins.

The first type of shelves is easier to implement than the second. To implement it, you will need a wooden beam with a size of 5x5 cm and plastic containers, which can be found in a construction supermarket. The timber must be cut to the size that will equal to length plastic container. The next step is to select a groove in the middle of the beam. The width of the groove must match the size of the side on plastic container. The design of the shelves will be similar to drawer, which is in tables or cabinets. Next, the prepared bars are attached to the ceiling with anchor bolts. The distance between them is calculated so that the container fits freely inside. After fixing the bars, containers are inserted and the shelves are ready. These shelves are best for storing items that are rarely used.

To implement the second shelf option you will need:
- studs M12 or M14;
- 10 mm plywood or OSB sheet;
- nuts;
- anchor bolts with hook;
- perforator;
- drill;
- washers;
- wrench.
The first step is to decide on the size of the shelves and cut levels for them from plywood or OSB. The length of the hairpin can accommodate several partitions. The next step in assembling the shelves is to drill holes in the prepared wooden modules. The holes should be located in the corners of each shelf element. Next, the pins are threaded into the hole and the wooden shelf module is secured on both sides with a nut and washer. In this way, the required number of levels is collected. The next step is to mark the holes on the ceiling.

It must exactly match the location of the studs. Holes are drilled using a hammer drill and anchor bolts with hooks are inserted into them. Next, all that remains is to screw an eyelet onto each hairpin and hang them to the installed hooks. Such shelves have a weight limit, so you should be careful when choosing the things you put on them. A video about the types of garage shelves is below.
Tool shield
A separate type of shelf can be identified as a toolboard. In terms of convenience, there is hardly anything comparable to using a shield. It is a perforated plane made of metal or wood. Hooks are inserted into the holes or additional modules are attached, on which the tool is placed or hung. This shelf is easy to make with your own hands. It is enough to take one or several sheets of OSB or chipboard, mark them and drill holes with a drill. Next, hooks are made from strong steel wire, which are fixed in the holes. On such a shelf it is easy to place not only all hand tools, but also power tools that will not be scratched on ordinary shelves.
Summary
As you can see, building shelves for a garage is not particularly difficult. If space allows, shelves in the garage can be placed around the entire perimeter of the room. The frame of the shelf does not necessarily have to be metal; it can easily be made from wood according to the same pattern as given for metal shelves. But you should understand that such shelves will support slightly less weight than metal ones. Often garage owners make shelves in the form of racks. These shelves are the most practical solution. For ceiling shelves with containers, you can use an I-beam metal profile rather than wooden blocks as a base.
Surely, for many car owners, garage racks are an integral part of the premises. You can put various items on them - necessary and not so necessary: tools, garden utensils, screws, spare parts, children's things and more.
If you wish, you can make shelves in the garage with your own hands to suit every taste and any type. Let's look at what designs there are and what the installation process looks like.

Rack assembly drawing.
There are several types of garage racks that are perfect for this type of room:
- Stationary.
Made in the form of a frame of vertical posts and transverse partitions on which shelves are attached. The design is considered quite durable and suitable for almost any type of item. If you leave the crossbars without shelves, it will be convenient to place the wheels on them. Metal racks are most often used, due to the convenient ability to attach the racks to the wall using brackets, you can easily place heavy things on it. If you plan to store light items, wooden shelves are suitable. - Prefabricated and dismountable.
This kind of design is often used in garages; racks and shelves can have different heights and widths. The product is assembled on site, made of a metal angle on “legs” and has holes for fastening, which allows you to mount the racks at a convenient height. If necessary, you can completely dismantle it and assemble it in another place. There are plenty of prefabricated structures on the market, so you can choose suitable option for every taste. - Mobile.
The racks are equipped with wheels, which makes them easy to move from place to place. They are sold both ready-made, assembled, and those requiring self-assembly constructor type. Among the disadvantages, it is important to note the weight limit - it is hardly suitable for storing too heavy items. - Rotating.
Small vertical design designed for storage hand tools in the garage and other small items: bolts, nails, screws and other things. The rack scrolls, allowing you to easily access the things you need. Depending on the size, it is possible to place it on the floor or desktop. The main drawback is its low functionality, which is why it is only suitable as an addition.
The most popular types of garage shelving are listed above; there are many other types. For example, some people like hanging shelves in the garage, which are mounted almost to the ceiling and can be placed around the entire perimeter.
However, they are designed only for light objects and are not suitable for rooms with low ceilings. If you have a strong desire and ideas, you can make any convenient shelving for your garage with your own hands.
Required tools and materials
During the installation process, you will need a set of tools, which depends on the material of the rack equipment.
Mainly for the following designs you need:
- metal - a welding machine that fastens the rack or special metal corners and bolts;
- wooden - drill, self-tapping screws, screwdrivers, also attached with special glue;
- combined - a grinder or a hacksaw, they are required for cutting parts and the materials for fastening indicated above.
At the preparation stage, as well as during the process installation work, there will be a need to use measuring tools - a tape measure and a level. The products are fixed using brackets or anchors and dowels.

An example of assembling a garage rack.
To attach hanging shelves to the wall or ceiling in the garage, as additional materials, you will need iron hangers or pins. Thus, you also need to add a hammer to the set of basic tools.
Do-it-yourself finished shelving in a garage must be treated with special solutions if metal or wood materials do not have anti-corrosion properties. In the first case, a rust preventative is used, in the second, varnish is used.
Material selection
When planning to make shelving in the garage with your own hands, you should first of all decide on the material. IN this issue you need to start from the purpose of the design, that is, what items it will be used to store.
Depending on this, various options are suitable:
- Metal.
Metal racks often consist of steel or stainless steel plates. The material is not cheap, but is distinguished by its strength and long service life, can withstand heavy weight and is excellent for storing almost any type of item. In addition, the design will be fireproof. Among the disadvantages, it is worth noting the possibility of corrosion, if present high humidity, which is not uncommon in a garage. But the problem can be prevented with the help of special means. - Tree.
To make wooden shelves, oak, pine and ash are most often used. The material has a number of advantages, the key ones being the ability to easily adjust wooden shelves to the desired size or remove excess and relatively simple installation, since there is no need to use a welding machine. However, there are also many disadvantages - high humidity has an extremely negative effect on wood, changing its shape and structure, there is a high risk of fungus formation and, in addition, the material is a fire hazard. - Plastic.
Plastic structures are not particularly popular among car enthusiasts. They have the main disadvantage - a weight limit, so you can only store relatively light, small-sized items. But despite this, making such a rack with your own hands is not difficult; plastic is a lightweight material and does not require special skills for installation. - Combined materials - using several materials at once.
It should be noted that often, in attempts to save money, shelves made of chipboard and OSB are used, but this is not the most the best choice, the material is relatively weak and wears out quite quickly.
How to design shelf structures?
Before assembling the rack, first of all, you should choose correct location products.

Drawing of a rack for garage tools.
Usually shelves are placed along one wall, but it is important to pay attention to several points:
- quick access to the racking equipment must be provided;
- you should note in advance what items will be stored, this is important when making a drawing;
- if you plan to store heavy and large items, it is recommended to allocate lower shelves for these purposes so as not to damage the car or injure a person, especially if the garage is small and the product will be mounted too close.
As with the manufacture of any design, you first need to develop it on paper or use ready-made diagrams and drawings. Correct development of a drawing begins with measurements; measuring tools are indispensable here.
The location of future elements is marked on the wall, which is especially important when installing a stationary product.
If you need to make a rack in the garage to store “small things”: books, small tools, cans, then a simple design with shelves 25-40 cm wide is quite suitable. The height of such racks depends on the height of the room and the amount of storage space required.
It is also necessary to determine the distance between the shelves. Often the lower ones are made higher, since it is on them that it is better to place large objects.
In the case of saving another type of item, you will need to start from their size and take into account the load. The choice of material and fastening also depends on this; it is important that the rack structure can withstand the load well.
Manufacturing a metal rack with wooden shelves
After determining the location for the garage shelves and making a drawing, you can safely begin installing the structure. The most durable and popular option is a metal frame with shelves made of boards. Rectangular profiles are used as racks, and the frame itself is made from a corner.

Shelf manufacturing diagram.
In addition to the materials, you will need to prepare the following tools:
- level, tape measure and materials for marking the location;
- electric drill;
- grinder;
- hacksaw for metal and wood;
- screwdriver;
- hammer;
- materials for fastening: nails, screws, dowels, etc., which will help secure the product to the wall and to each other.
At the next stage, the parts are cut, let's start with the vertical ones. The quantity depends on the selected preparatory stage number of sections. You need to add 1 to this number, since its edge is also taken into account.
If there are enough materials, then it will be possible to make the elements the same, but if not, it is quite possible to “sew” some areas together using strong connecting materials, for example, tightening bolts.
Next, we cut the horizontal elements according to the diagram. If you plan to create a shelving unit in your garage for storage with your own hands different types objects, then there will probably be shelves in it different sizes. It is preferable to place heavy items on a solid base.
Products made from boards based on chips such as chipboard or OSB will not be suitable in this case; they are only suitable for the upper shelves, where it is better to store small items, but multilayer plywood will be a good option.
And finally, you can move on to the final stage - assembly. It begins with the installation of vertical supports - prepared metal elements are fastened by welding or bolts and a frame is created. Afterwards a primer and anti-corrosion agent are applied to it.
Next, you need to wait until the product dries. Then the cut wooden elements are “tried on” and inserted across the structure. Wood boards should be processed and attached to a metal frame.
Depending on the preferences of the car enthusiast and the purpose of the frame product, it can be simply assembled without additional support or attached to the wall using steel brackets. If you are not confident in the strength of the structure, it is better to choose the second option, this will prevent the homemade rack from accidentally falling.
Making a wooden rack
Some people prefer to do it themselves wooden rack in the garage. It will cost less than metal, but will not be as durable and the service life may also be shorter. In addition, you will have to tinker a little with the wood.
A wooden rack is best made from oak or other hardwoods; pine is often used, but it has lower strength. Please note that the material must be dry and free of fungus, mold or cracks. This is a must.
Vertical racks products are made from beams measuring 10 by 10 cm and 5 by 10 cm. As mentioned above, for wooden shelves It is better not to use low-strength material. The size of the boards depends on the objects that will be stacked on them; the optimal depth is 50 cm, the width is no more than 1.5 m, the height between tiers varies from 30 to 50 cm.
However, here it is better to start from personal convenience. As with metal frame construction, when making shelving out of wood, it is also important to plan the shelves to store large, heavy items underneath.

Drawing for assembling a shelving unit in a garage.
Before you make a rack in the garage from wood, you need to prepare the tools:
- measuring tools and a pencil or marker for marking;
- electric drill or screwdriver;
- wood hacksaw, saw or machine;
- fastening materials – bolts, nuts, screws, special glue;
- grinding machine or sandpaper;
- metal corners are optional, but will help further strengthen the wooden structure.
In addition, you will need tools for processing wood: primer, varnish, spatula and brush.
The assembly process begins with cutting the wooden elements into pieces of the required size, let's start with the bars for the frame. Then the parts must be sanded, and then the metal corners must be screwed to the posts using self-tapping screws and a screwdriver.
If the corners are not used, then it is quite possible to replace them with pieces of timber with a section of 5 by 5 cm. The next step will be attaching the transverse bars, they will serve as the basis for future shelves.
The next step is to manufacture the shelves according to the previously prepared drawing. Paint is applied to the finished boards and, after drying, they are attached to the “skeleton” of the product with self-tapping screws. The rack is placed on “legs” and attached to the wall for reliability. Be sure to treat it with a fire retardant, which will protect the wood product from fire.
Bottom line
Surely, almost every garage owner needs to install shelving equipment. It is used for storage purposes various items, starting from replacement wheels and ending with various small things, such as books, cans of preserves, tools, garden utensils and more.
When planning to make a structure yourself, you should first decide on its type. Then you need to allocate a place for it, select the appropriate material and create a drawing according to which the product will be assembled.


