How difficult is it to install platbands on doors and can you do it yourself if you have never encountered such work? In principle, a door frame, for a door made of wood, plastic or metal, differs only in material, the technology is the same everywhere and then you will learn: what types of trim there are, what is needed to install them, and most importantly, how to do it all yourself.
Door trim is important point in the design of any room.
Before preparing the tool and buying components, let's figure out what kind of door frames exist.
Common materials
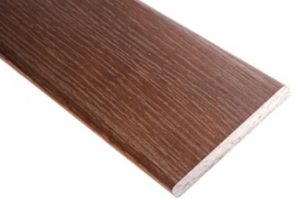
Wooden door frames are classic version finishing, there are both budget models made of pine or linden, as well as elite species such as oak, beech or overseas wenge wood.
Working with wood is more difficult, since the material is living, and therefore subject to temperature and humidity deformations. If you decide to give preference to this option, then keep in mind: the wood must be dry and preferably impregnated with an antiseptic.
No matter how beautiful the platband made from freshly sawn wood may look, after just six months it may begin to deteriorate or unpleasant cracks will appear.

Natural wood is deservedly considered a classic.
Second and on this moment The most popular contender in our rating is MDF. Door frames Almost 70% of consumers choose MDF. The material is completely environmentally friendly, because the wood is glued together not due to synthetic additives, but due to the high content of natural lignin glue in wood.
The weak point of MDF is considered to be swelling under conditions high humidity, but for the planks to deteriorate, the humidity must be really high, so the cladding cannot be installed in a steam room or on entrance doors from the street side. The kitchen and even the bathroom in a city apartment are quite suitable for installing MDF.
The line of MDF planks includes trim covered with veneer (a thin cut of natural wood); this cladding is absolutely no different from high-quality wooden products.

MDF cladding is good combination optimal price and high quality.
Now gone are the days when plastic products could be identified at first glance. Good plastic trim from the same MDF can only be distinguished by a specialist, and most importantly, the price for this product is quite affordable, plus it is much easier to install plastic with your own hands.
In addition, plastic is indifferent to any humidity, quality models They tolerate temperature changes and direct sunlight well. Perhaps the only place where it is not recommended to place plastic is a steam room, this ban is explained by the fact that many synthetic compounds begin to break down at temperatures above 70ºC.

Plastic trims have excellent appearance and high performance characteristics.
There is still metal cladding on the market. As a rule, metal is used only for outdoor installation, but it is very narrow niche, because a casing on the front door is often not required, since its “duties” are performed by the load-bearing outer frame metal door, and now they practically don’t put a tree at the entrance.
A few words about the instrument
In order to install any door frames efficiently, they need to be cut accurately, evenly and without chipping, and for this it is advisable to have a miter saw on the frame, and the frame must be rotated and fixed at a certain angle.

Miter saw on the bed.
If your plans do not include buying a cross-cutting tool, then you can get by with a hacksaw, but this requires some skill, since without experience it is very easy to chip along the edge.
From the auxiliary tool you need:
- Hammer;
- Plumb;
- Level;
- Roulette;
- Pliers;
- Pencil.

Method of pruning using a miter box.
Materials you will need:

- Special finishing nails with a small head;
- Liquid nails glue or polyurethane foam, plus a gun for the tube;
- Masking tape.

It is more convenient to apply polyurethane foam using a gun.
How to install platbands with your own hands
There are 2 ways to install such cladding: oblique joining of planks at 45º and direct joining of planks at 90º. In addition, there are serious differences in the installation of wooden (MDF) trim and plastic products, but let’s talk about everything one by one.
Method No. 1. Installation with cutting corners
This installation method is suitable for both flat or semicircular planks, and for curly trims. The oblique cut fits organically into general interior doors and this cladding looks great.

Joining planks at an angle.
Whatever method you choose, work begins with trimming the edges of the planks; in other words, you need to cut off a few millimeters from each edge. If you have a miter saw, you can cut it in batches, all at once.

Trimming the edges of the platbands.
Polyurethane foam is usually blown around the perimeter of the door frame, so you need to carefully cut it off; here it is more convenient to use a removable blade from a mounting knife.

We start marking with a strip that will be installed on the side door hinges. A couple of millimeters are left between the bar and the canopies so that when opening the hinges do not rub against the casing.

Important: the trims are attached after the doors are installed, and the finishing of the walls, ceilings and floors is completed, but before the baseboards are installed. The planks should rest on the floor, not on the baseboard.

Trying on and marking the plank.
The mark is placed on the lower edge of the future cut. All other strips are marked similarly. After marking, do not forget to number all the parts.
In the presence of miter saw you need to rotate the tool table at 45º, attach the bar to the stop and cut.

Corner trim trimming.
If there is no trim, then 45º can be marked with a square and pencil. To do this, draw a transverse line from the previously marked point.

Transverse markings at right angles.

It’s even easier with the top bar, where you attach it to the two side ones, as shown in the diagram below, and mark it according to the fact. With this approach, errors and gaps in the corners are practically eliminated; even if the corner is not marked quite correctly, that is, not at 45º, it will still fit perfectly.

There is a little trick here: first you need to nail both side strips with 2 - 3 nails, and then place the top one under them and mark them.
When everything is marked and cut off, you can proceed to installation. We will nail the casing to the door frame with nails, and to secure it to the wall we will use polyurethane foam. To do this, simply apply a strip of foam to the edge of the plank.

If you decide to glue platbands only with liquid nails, then this composition has interesting feature. First, glue is applied to the plank, after which the plank is pressed against the base and immediately comes off. Then you need to wait about 5 minutes for the glue to dry slightly and only after that you can “plant” it completely.
The top strip is attached first, and it needs to be nailed in the center. Then, when you start installing the sides, you will have the opportunity to slightly adjust the top if necessary. When the entire “constructor” is folded, the planks can be finally fixed; the nails are hammered in increments of 150 - 200 mm.

The final touch will be fixing the planks with nails from the ends. To do this, slightly bend both planks away from the wall and hammer in a nail.

Fixing the platband in the corner.
If the corner does not meet exactly exactly, then the gap can be covered with acrylic putty or special furniture wax to match the trim. Although the entry points of the studs are virtually invisible, many people are still irritated by this, so the nails can also be covered up.
Method No. 2. Joining planks at right angles
This method is justified only if you decide to install a figured capital on top. Then the capital itself is nailed or glued first, and then you need to try to cut and attach the two side strips.

The upper capital will significantly improve the appearance of the door.
Often those amateur craftsmen who do not want to bother with cutting corners at 45º join the planks at right angles. There is nothing wrong with this, but this cladding does not look so impressive.
There are no special wisdom or secrets here. The only thing we can advise you is to direct the cuts of the two side planks upward so that they are not visible, but top bar insert between two side ones. As in the photo below.

The joining at right angles will look better if the top bar is inserted between the side ones.
If you want to join planks with rounded edges at right angles, then it is better to cut the top plank at an angle directed inward, so that the cut edge lies on the rounding. In this case, the end of the plank will be invisible.
Installation of plastic platbands

A high-quality plastic platband may not be visually different from natural wood.
The plastic structure consists of 2 parts: a base with mounting grooves is attached to the edge of the door, and then the front part of the casing is put on this base. To beautifully dock the front parts of the structure, the set includes special docking gaskets.

Docking gaskets for plastic trims.
Plastic trims are quite flexible and if the base is fixed on a curved wall, it will go around the unevenness and putting the front part on will be problematic, so first you need to level the walls around the doorway, and only then attach the plastic.
By the way, rigid planks, MDF or wood, can be mounted on curved walls. True, then you will need to putty the places where the plank departs from the wall. It looks, of course, very mediocre, but still better than holes under the trim.
Plastic platbands are often chosen because there is a cable channel inside such a structure and wiring can be hidden in it. But there is a nuance here: do not even think about hiding a high-voltage cable in the casing; according to SNiP standards, this is strictly prohibited. Only low-voltage cables, for example, an antenna or communications, can be laid here.

Fastening the base with self-tapping screws.
As in previous cases, the bar from the hinge side is attached first. Usually the supporting strip is fixed with self-tapping screws and plastic dowels, but no one is stopping you from placing it, for example, on liquid nails.
The lower supporting strips need to be measured and trimmed very precisely, because any mistake at this stage will lead to the fact that your upper face strips may simply not meet. Plastic can only be mounted with a 45º trim; installation at a right angle is not provided here.
After the side base is secured, the front strip is put on it and the connecting gasket is inserted on top, then you can proceed to attaching the base under the upper casing.

When the entire structure is assembled and you are convinced that all the joints fit exactly and nothing is missing anywhere, you can begin laying low-voltage cables inside the casing.

Laying the cable in the cable channel of the plastic platband.
Conclusion
As you can see, if you have a tool and a great desire, then you can easily and quickly install door frames with your own hands. We also recommend watching the video in this article; there are a lot of subtleties there that you would like to know about.

The final stage of door installation is the installation of platbands - decorative elements framing door leaf along the perimeter. Thanks to them, the entire structure takes on a complete look and fits harmoniously into the interior. Various types of door frames are widely represented on the construction market. They can be supplied complete with doors or purchased separately. In this review, we will consider the variety of these decorative elements, the features of selection and installation.
Classification and types of platbands
There are basic criteria by which door frames can be classified.

The shapes of the platbands are:
- Flat (with a rectangular cross-section) - a regular plank, the front surface of which is flat (with small chamfers along the edges).
- Rounded (with a rounded section or teardrop-shaped).
- In curly ones, the front surface has a relief shape. These include capitals, cornices, rosettes. They are acceptable when used with classic doors.
According to the installation method, products are divided into:
- Wall mounted.
- Mountable to door frame.
Depending on the mounting method:
- The invoices are attached using nails driven directly into the platband or special fasteners hidden inside the structure.
- Telescopic ones are mounted using special combs that fit into the grooves door frame and extras. The telescopic system makes door blocks universal and makes it possible to install them in doorways without complex modifications.
Schematic example of a telescopic molding:
|
Installation option without additional installation |
|
|
Installation option with extension |
 |
| Platband | |
|
|
|
| Box plank | |
 |
|
|
Additional plank |
 |


Based on functionality, platbands are divided into:
- Simple (monolithic).
- With cable channel.
Using the latter type, you can hide television, telephone and other switching wires. The process of installing a plastic frame with a cable channel can be studied in more detail in the following video clip:
By location they are distinguished:
- Internal. Depending on the depth of the opening, they can be supplemented with additional strips.
- External planks are those facing the street, into the hall, living room, corridor. Sometimes they are decorated (with carvings or capitals).
 The capital for doors is made of wood or MDF and acts exclusively as decoration (it can have a variety of shapes and figured carvings).
What are they made from?
- Wooden frames are usually made not from solid wood, but from jointed wood. This element can be painted in any color or varnished.
- MDF platbands are made from wood fiber medium density slabs. Such products are cheaper than wooden ones, and their service life is almost unlimited.
- Plastic (PVC) samples are more resistant to moisture and temperature changes, and therefore are not susceptible to rotting and mold. They are available with cable channels.
- Ceramic - this is an imitation of framing by laying ceramic tiles on glue.
- Stone platbands are not very common. They are used, as a rule, to decorate the entrance door on designer facades.
Most often, platbands come complete with doors. But sometimes you have to buy them. In this case, try to choose decorative item high quality, and compatible with the door leaf or wall color. If there are wires that require masking, give preference to plastic products with a cable channel.
When using telescopic systems, glue the slats to the wall, not the frame. Otherwise, you will not be able to carefully dismantle them later, if necessary.
An equally important point is the joining of the floor covering (laminate, parquet) with the platband. To avoid cracks, the laminate in this place must be laid closer to the wall. And make a recess in the wall itself so that flooring did not deform during seasonal expansion.
As for trimming trims:
- Planks of any shape can be joined at an angle of 45º.
- At an angle of 90° - only flat ones.
Note! The set may include 4 thick flat trim and 1 thin one. Trimming in this case is appropriate at 90°, and the thin sample is installed at the top.
Summarizing the material discussed above, it can be noted that the platbands various types are very important in the design of doors. There are, of course, cases when their installation is inappropriate. For example, for very thick walls or in rooms where all the walls are tiled.
Few people do not know that platbands are small decorative elements that are installed around windows both outside and inside any building. By the way, they not only give the windows a finished and neat look. Platbands are also needed to protect the seam between the wall and the window, usually filled with polyurethane foam, from the influence of a number of external factors, such as light, water, wind, etc. Also, the purpose of using platbands is to increase the protection of the house from drafts .
Visually, the platbands look like small rectangular strips. They can have different colors, and among them there are also beautiful decorative models (carved, patterned, etc.).

Previously, most often, platbands were made of wood, but now, in the world, it is from this that they are mainly made. This is due to the ease of manufacture of products, durability and low cost of the material. The advantages of plastic platbands are as follows.


On a note! Previously, it was believed that plastic platbands are installed only in combination with plastic windows, but this is a mistaken opinion. They can completely replace the decor and wooden windows. It’s just that in this case it is better to choose the option that will imitate wood in appearance.
Also, plastic platbands go well with and harmonize with other materials intended for facade finishing. You can simply choose elements that perfectly match the color, or choose a contrasting color option.

Types of plastic platbands
Plastic platbands can be divided into several types depending on the production method, appearance, method of fastening, etc. Based on appearance, they are distinguished into embossed and smooth. Here they do not have any special differences in quality, the only difference is that some are perfectly smooth, others have a certain relief (for example, they imitate the structure of wood). By the way, embossed ones are a little more difficult to keep clean - dust can get caught in the grooves of the relief, which is quite difficult to remove from there.

Important! When choosing platbands, you should take into account not only their appearance, but also the method of fastening, manufacturer, cost, etc.
Table. Types of plastic platbands depending on manufacturing technology.
| View | Description |
|---|---|
| Material such as sheet plastic is used to create ordinary flat trim. In some cases, the product has a monolithic structure, and sometimes it can be heterogeneous inside. The stretch coefficient of the material is quite low, so such a casing will not deform under the influence of temperature. Therefore, large thermal gaps, which are necessary when installing these elements, will not be needed here. This is the simplest version of plastic platbands. They are usually installed outside the house. The main thing is that the façade of the building and the plane of the window coincide. |
| Such platbands can be embossed or cast. Suitable for installation both outside and inside the house, because they are not afraid of exposure to temperatures or ultraviolet radiation. Thanks to the use of materials such as polyvinyl chloride for the manufacture of products, it was possible to significantly expand and diversify the types of platbands. This is one of the most commonly used types of elements. |


Also distinguished overhead and telescopic platbands. The latter, unlike standard invoices, are a kind of construction kit that is assembled into a single system using special locking connections. Often, such platbands also come with additional accessories. The cross-section of the telescopic casing is L or T-shaped. The overlay platband is simply applied and fixed in the right place using decorative nails or self-tapping screws; it can also simply be glued to adhesive or mastic.
Prices for plastic window frames
Window trims
Installation features. Preparing the window opening
Oddly enough, the finishing of plastic windows must be carried out strictly according to a certain standard, which is regulated GOST 30971. If you follow all the requirements and norms of the document, then the window will not be affected by winds, and the foam used for installation will not crumble or collapse over time, the windows will serve for many years without complaints. Overall finishing plastic window, and indeed any window, consists of installing elements such as platbands, slopes and window sills.

First, of course, install window frame. However, this design looks unfinished and sloppy. As a rule, layers are clearly visible between the wall and the window polyurethane foam, which, even with the protruding parts cut off, looks unpresentable. To begin with, it is important to cover it with a membrane vapor barrier - it will ensure the outflow of moisture, which can penetrate even the slightest cracks. The presence of a vapor barrier will help keep insulating materials dry.

Important! You should not replace the vapor barrier with ordinary polyethylene. It is not as good as specialized material. It is important to understand that moisture can penetrate from everywhere, and not just from the outside, so the insulation separated by polyethylene will still get wet - as soon as the temperature outside the window drops, condensation will appear. The vapor barrier will help remove it, but the film will not allow it to leave, which is why the materials will still become damp and this will not end well.
Installation of platbands
Platbands can be installed different ways. Most often they are attached to the wall or directly to the window frame using special mounting elements - for example, latches. That is, having installed such elements on the frame, the platbands can simply be snapped onto them. The main thing is that all latches are intact and not deformed.

You can also attach the trim using double-sided tape. The most important thing is to choose a good one and quality material. But in any case, it is worth understanding that the method is not highly reliable. At severe frosts, and also in windy conditions, the tape may not cope with its task, and the platbands will simply fall off. So this method is not recommended if you want to do everything efficiently.

Platbands are always a home decoration
The joints of two platbands must be cut at an angle of 45 degrees. The easiest way to do this is to use a mounting angle with the required markings. Also, cuts can be made at right angles. In this case, they should be on horizontal trims on both sides.
Installation of platbands using the adhesive method
Step 1. When the window frame has already been installed and other preparation measures have been completed, it is necessary to make markings on the outside of the wall that will facilitate the installation of the casing. The easiest way to do this is to use a coated thread stretched from one edge of the window to the other. It is also necessary to add the width of the platband on one side and the other to the extreme points. The markings must be applied both below and above the window opening.


Step 2. Now you need to attach the trim to one of the edges of the windows (the one to which it will be attached) and then make a mark on it with a pencil, drawing a line from the corner of the window at an angle of 45 degrees.


Step 3. Now the excess parts of the platbands need to be cut off or sawed off using special devices for cutting even corners (such as a miter box).

Step 4. After this, you need to prepare a special adhesive solution or buy a ready-made one. The composition must be prepared in accordance with the instructions.

Step 5. The adhesive composition must be applied to the back side of the casing, and also be sure to be applied to the wall where it will be mounted, in accordance with the markings.


Step 6. The next stage is gluing the platband. It needs to be pressed well against the wall.

Step 7 It is important to connect the vertical and horizontal trims securely and without gaps.

Step 8 Remains of the adhesive along the perimeter of the platbands, as well as in the places where they join, must be removed.

Step 9 The lower casing must be secured with bolts. To do this, you need to make 3-4 holes of the required depth in it and the wall of the house.

Step 10 You need to pour a little glue or sealant into each of the holes.

The holes are filled with sealant
Prices for polyurethane sealant
Polyurethane sealant

Step 12 All joints between the platband and the wall of the house must be coated with sealant. The holes into which the bolts were screwed are also filled with sealant.

Video - Installation of platbands
Installation of window slopes
The window will not be finished if you do not frame it with slopes from the inside of the house and install a window sill. Let's look at how this type of work is performed.
Step 1. In order to install a standard slope system, consisting of trims, starting profiles, corner covers, latches and slopes, you will need a pencil, tape measure, square, masking tape for measurements, drill, screwdriver, screws and dowels, and an angle grinder.

Step 2. First you need to measure the width of the slope panels in the lower and upper parts on each side, as well as the height of the starting profile. You need to attach the rule to the wall and measure the distances to the rule using a tape measure.

Step 3. The heights of the slope panel are also measured in the area where it adjoins the window and from the outer edge.

Step 4. All values obtained as a result of taking measurements must be transferred to the slope panels. It is best to apply them to the back of the panel. The edge with which the panel faces the room has a special lock. It is important to take this into account. The platband snaps onto such a lock.


Step 5. The excess panel must be cut off using a grinder or other tool.

Step 6. On the side of the panel that will be facing the window, you need to put on the starting profile. This will make it easier to trim it to the desired length.

Step 7 Before final installation and fastening the slope panel, it is important to simply attach it to the window and see how well it fits, whether it still needs to be trimmed, how well it adjoins the window sill.

Step 8 Now it is important to correctly attach the panel along the entire height of the frame. First, the starting profile is fixed on the wall. You can attach it either with double-sided tape or with self-tapping screws. Starting profiles are attached immediately to the right, left and top of the window.


Step 10 Snap the panels into starting profiles Just. They need to be inserted into the profile at an angle of 45 degrees, and then press on them and snap into place, installing them in the desired position. The side panels are also attached.


Step 11 Pieces of foam plastic can be placed between the panels and the wall as seals. This measure will allow you to get rid of gaps that may form between the slopes during the installation process.

Step 12 If necessary, the gap between the wall and the slope can be insulated using polyurethane foam.

Prices for a sealant gun
Caulking gun
Step 13 You can fix the slopes at a certain angle to the window using a special latch. Along the perimeter of the window you need to install several latches at a distance of 30-35 cm from each other. The two latches at the corners of the window should fit together. This is important because otherwise the corner cover of the slopes will not be able to fit into place and latch into place.


Step 14 Finally, you need to secure the latches on the windows using self-tapping screws. Holes in the wall for dowels and screws are made using a drill.

Step 15 Now you can begin installing the platbands. First you need to measure the required length on them, attaching the trim to the window, and then cut off the excess.

Step 16 It is very simple to put the trims on the latches - you need to press them along the latches and, with a blow of your hand, secure them to the clips until a characteristic click is heard. All that remains is to install the decorative corner covers and be sure to remove protective film. The work is completed.

Find out how to install, and also check out the installation options in a special article on our portal.
In general, installing platbands on windows is not as complicated as installing the windows themselves. The main thing is to perform all actions consistently and carefully. And then everything will definitely work out. But, if you have any doubts about your abilities, it is better to invite help experienced craftsmen so as not to spoil the material.
The general appearance of the planks is usually rectangular, but the shape varies depending on the type of cut:
- Flat (straight). The surface is flat and has the shape of a rectangle at the end. They are installed at right angles to each other (pictured below).
- Figured. They are distinguished by the presence of a certain relief (in the form of rollers) on the surface. The vertical pattern gives the doorway an original look.
- Radius (semicircular). The surface is convex. Depending on the design solution It can be symmetrical in the shape of a crescent or slightly offset to one side of the bar, resembling a falling drop.


Options for using platbands
When choosing, you should consider the location of the doors in the room:
- For interior you can use any materials.
- On the front door inside the apartment– metal or plastic, characterized by increased resistance to mechanical stress.


The photo shows unusual mirror frames in the bedroom interior.
Platband material
Thanks to the variety of materials, you can create an opening in any room; it is only important to take into account the features of each of them:
- Plastic. PVC is used for production. They are most often used on doors made of the same material. PVC is not afraid of moisture, prevents mold and is often equipped with cable ducts. Big choice
- colors. Wooden. Made from spliced solid wood (common furniture materials– smooth eco-veneer, veneer) do not deform over time. Easily match in tone and texture with
- MDF.
- The most common companion to MDF doors is that they are lightweight and easy to install. Exactly repeat the shade and texture of the canvas.
- Gypsum. They are used as an addition to the existing gypsum decor in the room - stucco for the ceiling or walls. Painted plaster requires careful use, as it easily crumbles upon impact.


Metal. They are used both for the design of entrance doors and interior doors - glass in high-tech interiors.


The photo shows a corridor decorated in a classic style. Doors and trims form a single ensemble.

Regardless of the material, the platbands are installed strictly perpendicular to the floor. In the photo, the metal frame perfectly complements glass doors
in the hall.
Color range of platbands Traditionally, the color is selected to match the color of the door and the overall color scheme
- . But you can always stick to basic colors:
- White.
- Wenge.
- Black.
- Brown.

Gray.


In the photo, the door and trim are made in the same color scheme. As - modern solution contrasting color


doors and grey, dark or light shade of planks - this combination looks original and stylish (example in the photo).
Design and forms of decorative trims
Making an accent in the interior is quite simple if you choose the right shape:
Narrow


They are chosen when the door is very narrow and elongated, when the corner of the room and adjacent walls are located close (as in the photo), if there is a niche above the door. Often, they are purchased in order to save money for decorating utility rooms.
carved


Decorated with carved patterns on natural wood.
Wide


They create a special tone in the interior and, unlike other types, are not necessarily combined with the color of the door; the combination with the baseboards is much more important. Ideal for paneled doors.
Semicircular

They are framed by semicircular openings and arches. The sizes are individual, most often attached using telescopic fasteners.
With patterns Beautiful decorative effect , obtained by using patina even on simple material


. This technique emphasizes and enhances the classic interior. Used in styles such as Provence, Baroque, Venetian. The photo shows a bathroom with bright decorative elements in the form wall panel
and patterned platbands.
Antique

Solid wood with a texture that imitates aged wood. Suitable for country, loft, Provence style.
The photo shows a doorway in the bathroom with an aged effect.
Capitals Additional polyurethane linings on the upper part of the doorway - used for decoration in a classic style (due to the lining, the platband becomes double). They perform a purely aesthetic function.


Design options for platbands in the interior of rooms
Depends on the room in which the doors are installed. The reason for this is different design interiors, as well as the peculiarity of the climate inside the room.
- Hallway. Most often found here Entrance door to the apartment. Platbands, door slope to the floor and the threshold is made of metal, natural wood or thick plastic.
- Bathroom. Bathroom - place high humidity. Taking this feature into account, you need to choose ceramic or plastic materials.
- Toilet. As a rule, a bathroom is a small space in which narrow trim made of ordinary plastic, wood or ceramics can act as a corner plinth.
- Kitchen. You can use different materials.

The photo shows the entrance door to small hallway– the design of the doorway with narrow metal trims was chosen.


There are no restrictions on the choice of material for decorating the doorway to the kitchen. It all depends on the design project and the taste of the owner.

Photos in various interior styles
In design modern interiors different style techniques can easily be combined. So, in the design of an apartment in the minimalist style, it is not at all necessary to precisely select the colors of the door leaf and trim (photo on the right). And in Provence or country style, classic beige trims will perfectly complement the interior with a door in light colors.


Photo gallery
Platbands have long ceased to be simply functional objects, but have become full-fledged and irreplaceable participants in the interior, with their own character and unique properties.
What types of door frames are there and what are their features? How many trims are required for each case? How are they installed? What are capitals for doors? What types of capitals are there? What is a cornice and how is it used? We will examine these and other questions in detail in this material.
Platbands - these are the components interior doors, which represent decorative strips. They are attached around the doorway to close the gap between the door frame and the wall. In addition, framing the door, platbands play a key role in how the door looks in doorway. Based on these functional and decorative tasks, the following types of platbands are divided:
What types of platbands are there?
Simple platbands for interior doors are thin strips, usually 7 cm wide and 8 to 10 mm thick. According to the shape of the surface of the platbands, flat rounded and shaped platbands are distinguished. Flat platbands include those platbands that have a flat front surface. Semicircular platbands can be either symmetrical or rounded to one side, which are called “teardrop-shaped”.
Simple flat and semicircular platbands are the most common. Almost all economy class doors have one of these types of platbands.
Another type of simple platbands are figured platbands. Their peculiarity is that the front part has a certain groove (grooves, convexity, concavity) along the clypeus. Such platbands are thicker and are often up to 90 mm wide or more. Curly trims give the doors originality and attractiveness. They cost more and are not available from all door manufacturers.
What are telescopic trims?

Telescopic trims for interior doors have this name because of their method of fastening to the frame. Telescopic platbands are platbands curved along their entire length in the shape of the letter “L”, i.e. one of the edges of the platbands is bent, forming an element for attaching the platband to the box by inserting it into the groove of the box. Due to this method of fastening, it is possible to adjust the width of the box to the thickness of the doorway wall within 10-15 mm.
That is, if the thickness of the wall is a couple of centimeters greater than the thickness of the box (which, as a rule, is 7 cm), then it will be possible to do without additional additions by spreading out the telescopic platbands, and the missing 1-2 centimeters will be covered by the telescope elements.
The advantage of telescopic platbands is that they are attached without nails, i.e. the front surface remains smooth. The downside is that such platbands cost almost twice as much and are expensive to install extra money. Telescopic platbands are glued to the wall and under no circumstances into the groove of the box.
Telescopic platbands for interior doors, as well as simple platbands, can be flat, rounded or shaped.
How are door frames installed?
There are two types of fastening of platbands to the door frame, both according to the method of fastening and the method of joining to each other:
Method of fastening platbands
1. Nail with finishing nails without a head, and hide inconspicuous nails with a wax pencil. This method of attaching simple platbands is the most common, because... quite durable and reliable.

2. Glue the trim to the box. This method is mainly used when installing white trims. On white trims, the nails are very noticeable and therefore they are covered with sealant or glued.

Method of joining platbands
1. Docking at 45 degrees. To avoid any gaps at the joint, the cut should be as neat as possible.

2. Docking at 90 degrees. Used when installing doors in modern style with straight lines. Applicable only to flat platbands with sharp edges. If the edges of the casing are slightly rounded, then the upper transverse casing should be thinner than the side ones, otherwise its end at the joints will be visible.

What are capitals for interior doors?
Capitals for interior doors are decorative element the upper part of the clypeus, often in the form of an overlay. Capitals were used in ancient times on ancient columns. Today we have almost no columns in our apartments, but to give classic interior high cost, this element is actively used in the framing of doors in a classic style. As a result, the platbands on the sides of the door form the appearance of a column. As a result, the doors look solid and representative.

Capitals are a separate independent set of platbands, which is often offered for expensive doors, and it costs almost the same as a door leaf. Capitals are often installed only from the front part of the room. There are capitals with and without cornice.
Capitals without a cornice visually do not rest against anything at the top and look like independent columns. At the top above the door between them there is usually a jumper in the form of a similar platband as on the sides, but it is also possible in the form of an independent element similar to a cornice.
Capitals without cornice top part rest against a cornice that looks like a canopy in the wall lying on the columns
What is a cornice?
The cornice of interior doors is a decorative element in the door set, framing the upper part of the door, forming a decorative ledge above the door. The cornice gives the door splendor and is characteristic of classic styles interiors. The cornice is most often installed in combination with capitals, but it also looks good in combination with simple platbands.

Complete set of platbands
Standard for single leaf swing door includes 5 sticks of platbands. It's two and a half sticks on one side and two and a half sticks on the other side.
It often happens, for example, in the bathroom and toilet, tiles adjoin the door frame and, therefore, in this case, trim is required only on one side - 2.5 sticks.


