Owners of small apartments prefer not to close open openings with doors, but to decorate them with arched structures. Due to this, the space visually increases, the interior of the room becomes much more elegant and two rooms are combined into one.
You can use ready-made arched structures, which are sold in hardware stores and are a set of parts, or you can assemble an arch with my own hands, having previously prepared the necessary materials.

How to make elegant elements? Look at the photo of the arch with your own hands. The list of technologies and materials used is huge - use your imagination!


Installing an arch in an apartment
You can install an incredibly beautiful arch in your home without the help of a construction team or engineering skills. It is enough to choose the arched design you like and the material with the tool to make it. If you follow the instructions below, you can avoid the most common mistakes that beginners do.

The arch structures themselves usually play a role in the construction industry supporting elements in the construction of ceilings and walls. In our example, doorways are not load-bearing structures. For the first case, materials are taken taking into account the serious load on the walls; decorative arched structures must only withstand their own weight.

The door arch in the apartment replaces the door; it is installed in the same place as the movable structure. This is a future design element.

DIY arch ideas are varied; we will describe the simplest ones in our article. You can make an arch using a beam with a 2-3 cm cross-section or a light profile. This design in any design it will perfectly hold the weight of the finish. The main thing is to securely fasten all the elements to the wall so that beautiful decor did not crumble after a couple of days.

Note! Decorative arch plays more of a design function in apartments, it does not support the main structures. The main load in such a situation is on concrete walls and lintels.

There is a huge selection of arched shapes and design solutions, each of which is selected for a specific case.

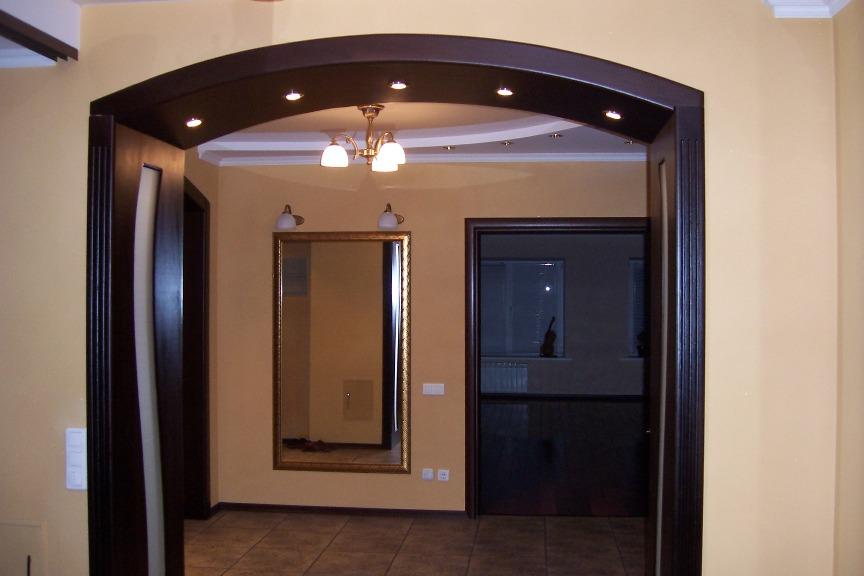
Presented above as clear example the arch has the shape of a semicircle correct form. In the latter case, a passage with strict rectangular outlines. Next come intermediate versions of arched structures.

There are many other examples where only one support or curved posts are used. Appearance door arch directly depends on the chosen room design.


You should take into account the size of the openings, the height of the ceilings and some possible features room layout. For someone in a house in a classic retro style, an elegant arch with a semicircular shape will fit perfectly, for others in a modernist style - a rectangular portal shape.

These things are influenced by the tastes of the owners and the design features of the apartment. Some even choose cone-shaped arches.

When choosing a classic, make sure that the ceilings in the apartment are high and at least 3 meters high. If you have a typical panel apartment With low ceiling, use the “modern” arch system.

The wide pillars of the “romance” model will perfectly complement the arch of the opening with wide pillars. The “portal” arch model is suitable for an interior with clearly predominant straight shapes. This option perfect choice for log houses.

Making an arch with your own hands
You can quickly make an elegant arch using plastic and laminated elements, step-by-step instruction How to make an arch is presented below. They are cut to the required height and then attached according to the instructions in the right places. This standard options, which are made according to a single template, will not surprise the buyer with anything, and the price is not always tempting. Yes, and choose a model required size under your opening is sometimes very problematic.

To make the structural elements of the arch, you will need the following materials: fiberboard, plasterboard and plywood. How to make an arch with your own hands? If you watched how professional builders work with plasterboard boards, you probably guessed that they are best chosen for sheathing. After installation, they can be finished with various materials. In turn, thin plywood has one big advantage - it bends easily.

The arch frame is made of a bar with a cross-section of 20 x 20 mm (30 x 30 mm) or a metal profile.

How to properly make an arch in an opening?
An arch made of red brick, concrete or aerated concrete blocks will be bright and provocative. Red brick can be used without finishing materials. Such an arch will emphasize the solidity and material security of its owner.

Perfect for modern design premises. The weight of such a structure is very large and it is not recommended to build something like this in old apartments, since there is a large load on the walls.

Metal structures with complex shapes should be left to professional designers and engineers. It is difficult and troublesome to work with metal; these projects are very complex in their implementation and engineering documentation is prepared in advance for them.

Profiles and drywall are the simplest and most affordable things that allow you to make structures of any shape and style.


Wooden arch
Not every person likes pine, but any other noble wood material can be used for finishing work: oak, ash and others. Beautiful arches in the interior will complement elegant classic wooden furniture.

In general, working with any tree without experience is very difficult. It is better to entrust all work to professional builders. Focus on your own capabilities and experience.

The opening of an arched wooden structure is created by assembling many small fragments. Using pressing, round elements are made, then they are glued or twisted together. This step will require a lot of tools and time.

Photos of arches with your own hands


In the life of any person, repairs occur from time to time. It may be associated with the purchase of a new house or apartment, with the desire to update the interior of a familiar home. One way to organize space is to create arched structures. Arches in a house can perform two completely different functions: unifying space when an arch is placed instead of doors; division of a large area to highlight several zones with different functions.
Of these two options, the arch in the doorway is more common, giving more interesting view apartment layout. When replacing a door with an arch, it is necessary to take into account the pros and cons of such a solution. The undoubted advantages for small apartment refers to the expansion of space. When combining kitchen and small room you can design a dining room where it will be convenient and pleasant to dine with family or friends.
If in long and narrow corridor If several arches are installed, then the feeling of narrow passages like in a train carriage disappears.

If an informed decision has been made to install the arch, then we proceed to choosing the shape of the decorative structure:
- Rectangular;
- Semicircular, having an equilateral rounding;
- Semi-arch having only one rounded corner;
- Trapezoidal, the design of which consists of curved lines;
- Fantasy.
The downside of an arch instead of a door is that you can’t close the door to highlight your piece in the apartment. If an arch is placed instead of a kitchen door, the smell of cooking food will spread everywhere.
How to make an arch in a doorway
Once the shape has been determined, it is recommended to make a template from cardboard, fiberboard or other available materials. Creating a template helps you visualize the final result and more accurately calculate quantities necessary materials. When designing, we take into account that installing an arch in an existing doorway will reduce its height by approximately 10-15 cm. If the dimensions of the opening are not sufficient for implementation design ideas or the owners of the apartment are quite tall people, then you will have to increase the height of the doorway. Changing the height or width requires large costs, including labor, financial and time to coordinate the redevelopment in the relevant organizations. Determining the shape and creating a template are the first stages of making an arch.

They are followed:
- Dismantling the old door frame (if this has not been done previously);
- Preparing the wall surface for arch installation;
- Creating a frame;
- Installation of an arched structure;
- Finishing and decoration.
All this work can be entrusted to professionals, but if you have the desire, you can do everything yourself.
Instructions: how to make an arch with your own hands
The cheapest and most common material for constructing an arch, as for many other works, is drywall. Dismantling the old one door frame. For more modern designs this is simple. You just need to unscrew the screws and carefully remove the trim. Old houses present various surprises to their owners. In ancient times, nails were used to secure the trim to the bars.
Carelessness during such work can lead to the destruction of ceilings or their damage.
After dismantling, we carefully evaluate the intermediate result of the work. The former doorway and the wall next to it should be clean, smooth, and without serious damage. Therefore, when cracks and chips are detected, we putty, this will help subsequently finish them correctly and efficiently. If you plan to level the walls with plasterboard, then this can be combined with the construction of an arch.
When the doorway is prepared, a U-shaped frame made of a metal profile is installed in it. It consists of one horizontal segment equal to the width of the doorway and two vertical segments, the length of which corresponds to our future design. The frame should be on both sides of the opening, that is, we actually make two of them. Two rows of 10 cm holes are marked and drilled in the profile. Then holes are marked and drilled using a hammer drill at the ends of the wall. The guides are attached to the walls.

It's time to use the pre-cut template. Sheets of drywall are marked along it, two parts for each arch are cut out using a jigsaw and attached with self-tapping screws to the installed profiles. It is also necessary to mount a profile along the edges of the attached template parts. Since we are looking at how to make a semicircular arch, an important step is to give the drywall profile the appropriate shape. To do this, we cut the edges of the letter P of our profile to the full height. The profile becomes obedient and takes on the geometric shape we need. After this, it takes its place along the edges of the cuts.
The next stage requires accuracy and attentiveness. We need to correctly install the arched fragment of our arch. The profile has already been installed, so we measure the length of the arc and the width of our part, cut out a rectangle. The difficulty is that the rectangle doesn't really want to become an arc. If ordinary drywall is used, then the main method of “pacifying” it is wetting and simultaneously imparting the desired shape. But this option may seem difficult to ordinary home craftsmen who are afraid of making mistakes. In this case modern technologies suggest that we use arched plasterboard, which takes a semicircular shape much more easily than regular one. We fasten our part in the usual way, moving from the center of the arch to the edges, and we are almost at the finish line.
We process the edges of the arch, cutting off the excess. After this, we treat the joints and edges of the drywall with perforated paper tape or sickle tape, putty, and process sandpaper. The choice of putty for finishing depends on the future decor of our arch.
Remained Finishing work, which we will return to a little later. If you plan to install lamps in the semicircular part of the arch, then you need to do this before you start puttingty. If you are afraid to take on an unfamiliar material, then you can install an arched structure made of plywood. In this case, two methods are possible: the first is similar to working with drywall, the second is described below.
Do-it-yourself door arch: making from plywood
To build such a structure, first measure the size of the arc of the future arch. A rectangle is cut out of a sheet of thin plywood, the width of which is equal to the width of the doorway and the length is equal to the size of the arc. Plywood is a malleable material, so the cut rectangle is evenly moistened, allowed to lie for a short time and bent to be installed in the opening.
It is important to place the cut out part evenly and neatly; this will require some skill.
Be sure to secure the part with self-tapping screws in the center, then along the edges. We fill the space between the resulting semicircular arch and the walls polyurethane foam and wait for it to dry. If free space a lot, then part of it can be filled with foam parts, and the remaining free space with foam. We cut off the excess foam and putty on the facade of our arch using sickle.
Less common designs are arches made of wood and brick. Despite the beauty and durability of such arches, their installation requires more expensive materials and the participation of professional craftsmen. The most interesting stage left in creating an arch in a doorway with your own hands is finishing. Various decorative materials can be used here.
Most common:
- Wallpapering;
- Decorative plaster;
- Coloring;
- Gluing finished foam finishing elements;
- Usage decorative stone and other types of finishing.
How to make a door arch with your own hands (video)
Thus, it is quite possible to make an arch in a doorway yourself, using a regular repair tool and available materials. The result of such work will be pride in one’s work and originality. decorative element in apartment design.
In ancient times, arches symbolized the firmament, the road of life, freedom, victory (triumphal arches among the Romans), protection (the arched form of city gates among the Slavs). And now designs of this type have not been forgotten, and most importantly, they are not difficult to make. So, a unique arch in the apartment and at the same time - with your own hands!
Create an arch of any shape
In apartments with a standard layout, the arch performs both decorative and practical functions - it separates neighboring rooms, making them more spacious, original, and organic. It also highlights functional areas, creates an atmosphere of coziness and comfort in the interior.
If the decision to make an arch with your own hands is made, you will first have to solve a number of questions, the answers to which will affect the financial and time costs.
Should I make one arch or several? A successful design move is to make both the door and window opening arched. An interesting choice is the use of identically shaped door openings and wall niches. The column and arch look original together.
What size should I make the arch? Its parameters match the dimensions of the doorway or slightly exceed it. If the design is made on the entire wall, then we're talking about already about the vault, not the arch.
The choice of the shape of the arched structure depends on the design and style and is limited only by imagination. Choose from the main directions:
- round (semicircular) arch - a classic, common option;
- Arabian (Moorish, resembles a horseshoe);
- pointed - two arcs intersect in one corner;
- concave - convex arcs go inside the opening;
- keeled - a semicircle with a pointed corner at the top;
- elliptical – top part such a design is an ellipse;
- parabolic - the upper part is made in the form of a parabola.
These are not all the options, but if the goal is to make an arch with your own hands, then preference is given to the traditional semicircular shape.
 Classic (round or semi-circular) arch
 The choice of material is not limited: everything is used - from plywood to brick, but plasterboard remains the “top” due to its relative cheapness and versatility (allows you to make an arch of any complexity and shape in a doorway), ease of finishing and speed of installation with your own hands.
The work involves arched plasterboard (GKLA), due to the use of durable cardboard and reinforced fiberglass, this material can be easily bent without damage.
How to make a plasterboard arch in a doorway with your own hands?
The operating algorithm is as follows:
1. Preparing a cardboard mockup
The first stage in finishing the doorway is preparatory. It is associated with taking measurements and making a template for the future arch.
Experiment by drawing the outlines of the planned structure on the wall, this will allow you to clearly visualize the result.
The installed arch will visually reduce the opening by 20 centimeters, so if its size cannot be increased, it is better to abandon the idea of installing an arch. Otherwise, instead of a noble arched structure, you will end up with a “hole in a hole.”
Removing the door frame
So, the arch visually reduces the opening, conclusion - increase the size if the ceiling height allows. How to determine how much? Do this so that the height of the expanded opening exceeds the top point of the planned arch by five centimeters.
An important condition for ensuring good result– evenness and verticality of the walls. Otherwise, the arch will turn out skewed. Conclusion - the walls are pre-finished with plaster and allowed to dry.
After expanding the doorway, prepare the surface by smoothing out uneven areas, get rid of excess material, removing dust and dirt.
Doorways in a load-bearing wall cannot be altered without the appropriate permits.
 This is how a profile is cut
 Installation of an arched structure
Making a frame yourself is not that easy, but it is quite possible. For this, builders recommend using metallic profile P-type (the so-called pawn, or more precisely, a 27/28 guide profile).
The size of the guides is determined by the width of the arch, quantity – 2 pcs. Install the frame on both sides of the doorway, slightly deeper inside (after fastening the drywall and applying putty, it will be flush with the wall).
Starting from the top, attach the first profile, then be sure to mount the second parallel to the first. Then they fix it on the sides, from the upper corner to the point of curvature of the arch.
In order for the profile to bend effortlessly, cuts are made on it at an average interval of 6.5 cm, for which metal scissors are used.
You can give the profile the desired shape by bending it according to the layout. When the frame arc is ready, it is attached to the ceiling and walls.
 An example of bending a metal profile according to the layout
 Fasten profile frame on walls made of brick or concrete with dowels; for wooden ones, self-tapping screws are also suitable.
Preparing drywall for installation in an arched frame structure
Draw the arched line of the arch using two identical sheets of drywall. If you don’t have a compass, use the means at hand - an awl (or self-tapping screw), thin rope and a simple pencil, or a ready-made flexible blank.
Make two identical halves along the intended line using a metal file (a simple hacksaw or electric jigsaw).
 The process of cutting drywall along an arc line
 Bend drywall
To finish the lower end side of the arched arc, cut a strip of a given size and bend it. For deformation, it is recommended to place a weight on the sides of the strip. To simplify the procedure, drywall is moistened with water and the surface is pierced with a needle roller.
Next, the still wet deformed strip is attached, starting from the middle of the arch, fixing it with metal screws along both sides. In accordance with the work technology, the drywall is allowed to dry. The time allocated for this is 12 hours.
 Bending drywall with a weight
 Treatment
The final stage of the main work - finishing. All joints of the arch are finished with putty, glued with reinforcing tape and puttied. Next comes step-by-step sanding and priming.
Decorative finishing
The culmination of the process of making an arch with your own hands is its decoration.
Video to help craftsmen:
How to finish an arch
The even shape of the arched structure in the apartment is half the success; finishing is no less important. You can decorate the finished arch with decorative narrow stone. A budget option– use of plaster, wallpaper, paint and varnish materials, decorative plaster. The flight of fancy is not limited. Decorate the arches by installing lighting or stained glass.
In contact with
You can make an arch in a doorway in various ways. Each of them is selected based on specific situation. It is necessary to take into account the construction skills possessed House master, as well as financial opportunities.
It is worth noting that it is possible to install a high-quality arch in a doorway with your own hands only when all the features of this design are taken into account. The fact is that this finishing option has its pros and cons.
The advantages include the following aspects:
- Visual increase in space. IN in this case two factors combine at once. The first is that an opening without a door unites two rooms, this erases some existing border. The second is based on the shape of the structure.
- An excellent option for zoning. Indeed, an arch can be an excellent solution to the problem of dividing a single area.
- Nice decorative look. This design can decorate any interior. It should be taken into account that overall design must be harmoniously thought out.
We must not forget about the existing shortcomings. They lie in the fact that the peculiarity of this product is openness, since there is no door leaf. Therefore, there is a complete lack of sound insulation and the penetration of foreign odors, if we are talking about the border with the kitchen area.
 When designing an arch, you should think about the fact that the feeling of security will disappear
Existing options
What is special about installing an arch in a doorway? The point is that there are different kinds of these designs:
- Ellipse. This configuration is considered to be classic. It is made round. All transitions are very smooth.
- Round.
- This option allows you to expand the opening. This method is suitable for cases where zoning is required.
 Trapezoid.
 Assumes the absence of rounded areas. Arch - various types of structures On a note! You can often hear that an arch and a portal are two different architectural elements. In fact, the portal is the most
simple solution
arched design. It is made in the form of a rectangle, sometimes supplemented with rounded corners.
Features of the construction of arches
You can make an arch in several ways, but you need to take into account the height of the openings.

For low openings
- This method of creating an arch involves pre-marking the surface. The marked area is cut out (hollowed). The general technology is as follows: The opening is being dismantled. Deleted
- old box
- . Part of the crumbling plaster is removed. The height of the future structure is determined. Lines are drawn along two vertical sides. They must be equal and made exactly at the specified height. To obtain the radius of the arch, the existing width is measured.
- This value is divided in half. Between
vertical posts
- a horizontal line is drawn. It should be located at a level that will correspond to the beginning of the rounding.
- On a note! It is important to consider that the distance to the ceiling should not be less than 30 cm.
 The center is marked on the drawn line. The self-tapping screw is screwed in. A cord is attached to the screw, which must be equal to a given radius. A pencil is attached to the end of the rope. This tool marks the bend.
 Trimming is done according to the existing markings. If the wall is strong enough, then chiselling is performed. To make the work easier, pre-drilling is done.
It is necessary to comply with the requirements for the construction of the arch
The door arch can also be made in another way. It lies in the fact that plasterboard and a metal profile are used as the main material. The technology assumes that everything will be done along an existing opening. The following actions are performed:

On a note! The created sheathing should be recessed to the thickness of the gypsum plaster boards used. Minor errors may occur. They can be easily corrected with plaster.

On a note! If you need to install an arch very quickly, the best solution would be to use a ready-made structure. These products are made from various materials and have standard configurations.
After all the procedures, an almost finished design is obtained. All you need to do is install a fragment of a gypsum plasterboard that will close the open arc-shaped space. The procedure is performed as follows:
- The bending section is measured.
- The resulting size is transferred to the drywall.
- The required fragment is cut out.
- This part needs to be bent. To do this, it is cut from the wrong side into strips.
- Carefully place into place and secure.
 Finished plasterboard arch
 The completed structure requires additional decorative finishing. It should be noted that drywall makes it quite easy to create an arch with your own hands. If you use wood as a material, you must have sufficient experience to correctly process and install such a product.
Fiberboards and plywood are used as substitutes for gypsum boards.
 Plywood is often used to create arched openings instead of drywall.
 There are some tips that will help you get a beautiful arched opening:
- The general appearance of the arch should correspond to the interior design.
- To get more original design– it is designed individually from different sides.
- Existing communications should be laid in advance.
Summarizing the above, it can be noted that there are various ways to make a door arch. You just need to be patient and stick to certain rules and recommendations. Then everything will definitely work out.
Any owner of a residential building with an arched passage has somehow wondered: how to design the arch so that it takes on a stylish beautiful view. In addition, it is necessary to maintain complete harmony general style premises.
As a rule, an arch is used to delimit space in the kitchen, living room, balcony, corridor and hallway. The design can take any shape, configuration and size, take different variants decor.

How to paint an arched passage?
The photo of the arch in the interior shows the most popular way of designing the structure - this is initial plastering, then painting. This method is equally suitable for use in both classic luxurious and super fashionable modern style.

Please note that first it is important to correctly select the base for the paint (the plaster itself), which is divided into several types:
- to create a relief effect;
- traditional putty;
- textured version of the composition;
- a special pigmented solution is applied.


First, before starting work, it is necessary to align the contours of the arch in the apartment as much as possible. For these purposes they use plasterboard sheets, corners and putty. Joints and possible cracks should be filled with serpyanka. To obtain the smoothest and clearest contours of the structure, it is necessary to fix the corners with a profile.

Then you should ideally evenly clean the work area by applying paint using a roller. If you intend to further decorate the element with relief accessories, it is wise to immediately use a pigmented solution. After finishing the main work, you can introduce linings or decorative curtains into the opening.

Decoration with stone and tiles
No less in a relevant way beautiful design arch is decoration facing materials, which include: tiles, natural or fake diamond, imitation brick. Less often the opening is decorated tiles, or mosaic.

An important advantage of this method is the introduction of arch decor into absolutely any style. The combination of stone can be completely different: with paper, textiles (wallpaper), plaster, paint.

When finishing an opening using this method, gypsum materials are usually used, but clinker and porcelain stoneware raw materials are not excluded. Due to their high strength and durability, they are usually located at the entrance to the house, or on the balcony area.


In order to decorate an arch with stone, that is, its original cladding is of high quality and reliably serves its household, you need to make the surface perfectly flat, and then select a good, appropriate glue composition.

The cladding can be made with an individual non-standard pattern, so it is first recommended to apply markings for further precise orientation of the masonry.

You can also line the opening with natural durable stone, but this will be a very expensive repair. Moreover, it is worth considering that the arch only needs to be in the opening load-bearing wall, or a solid partition.

The use of panels and stucco in the interior
A popular way to decorate a door arch is to frame it with special decorative panels and overlays. The most relevant and relatively inexpensive material is MDF, which harmonizes perfectly with classic style premises.

The surface is treated using artificial veneer or film. Please note that imitation of natural wood always remains at the peak of fashion.

To properly fix the panels in the passage, you should use special nails without heads and an adhesive solution. There are situations when you have to remove the level, you should use a spacer and foam for installation. This process is practically no different from installing a door frame.


As in other methods, you first need to level the surface and eliminate all possible cracks and joints. Markets and specialty stores building materials offer ready-made options pads that lock into place with a simple click.

An interesting way to decorate an arch in an apartment is stucco, which is not at all difficult to do yourself using glue or liquid nails. Most often, polyurethane is used, which gives the interior a special gracefulness, chic and luxurious rich look.


Can be done relatively simple shapes, or to produce complex bulky cast parts. The main disadvantage of stucco is rapid mechanical damage and failure.

Curtains and curtains
Since ancient times, an arched doorway has been decorated with ordinary curtains, but even now this design option, although less common, is acceptable. The entrance is masked with light tulle, a curtain or a thick curtain, which will serve as the door itself.

Usually, doorway disguised with bamboo curtains, beautiful threads, and decorative beads. This method is very easy to do with your own hands, using a cornice above the opening to fasten the curtains. There are cornices of a curved configuration that coincide with the very shape of the opening.

It is no secret that the arch serves as a continuation of the wall, which is why, when designing it, it is necessary to take into account the decoration of the walls.


As you know, wood is the most noble and wear-resistant raw material, which is successfully used to decorate classical household items. It is better if the design is simpler, but very elegant in shape. Wooden arch It is also possible to hang it with an elegant curtain with gilding, which will successfully highlight the classics.


Lighting solution
The beautiful design of the arch is complemented by built-in lighting devices, which can be point, side or contour types. The easiest way is to integrate lamps into a plasterboard element at the end.

The decorative opening is equipped with recesses where light bulbs are subsequently installed. To slightly hide the backlight, you need to mask the recesses with glass. It is important to use colored or translucent glass, which in itself will serve additional detail interior and design itself.

The arch that divides the space of the kitchen and living room looks very beautiful, and its lower part smoothly turns into a bar counter.

Photo of arch design options


